Your First Agent
A complete, step-by-step guide to creating, training, testing, customizing, and deploying your first Chatsby AI agent. Go from zero to a live support agent on your website in under 10 minutes.
Your First Agent
This guide walks you through the entire process of building and deploying a working AI agent with Chatsby — from creating the agent and uploading training data to testing it in the Playground, customizing its behavior, and embedding it on your website. By the end, you will have a live AI agent answering questions from your visitors based on your own content.
Estimated time: 10-15 minutes for your first agent. Subsequent agents take 2-3 minutes once you are familiar with the workflow.
Prerequisites
Before you begin, make sure you have the following:
- A Chatsby account. Sign up at chatsby.co if you have not already. The free plan is sufficient to complete this guide.
- Training content ready. You need something to train the agent on. This can be a website URL (the easiest starting point), a PDF document, a text file, or even plain text you paste in directly. For this guide, we recommend having a website URL ready — your company homepage, help center, or product documentation page works well.
- A website where you can add a script tag (optional, for deployment). If you just want to test the agent without embedding it, you can skip this — the Playground and shareable link work without any code changes.
Step 1: Create a New Agent
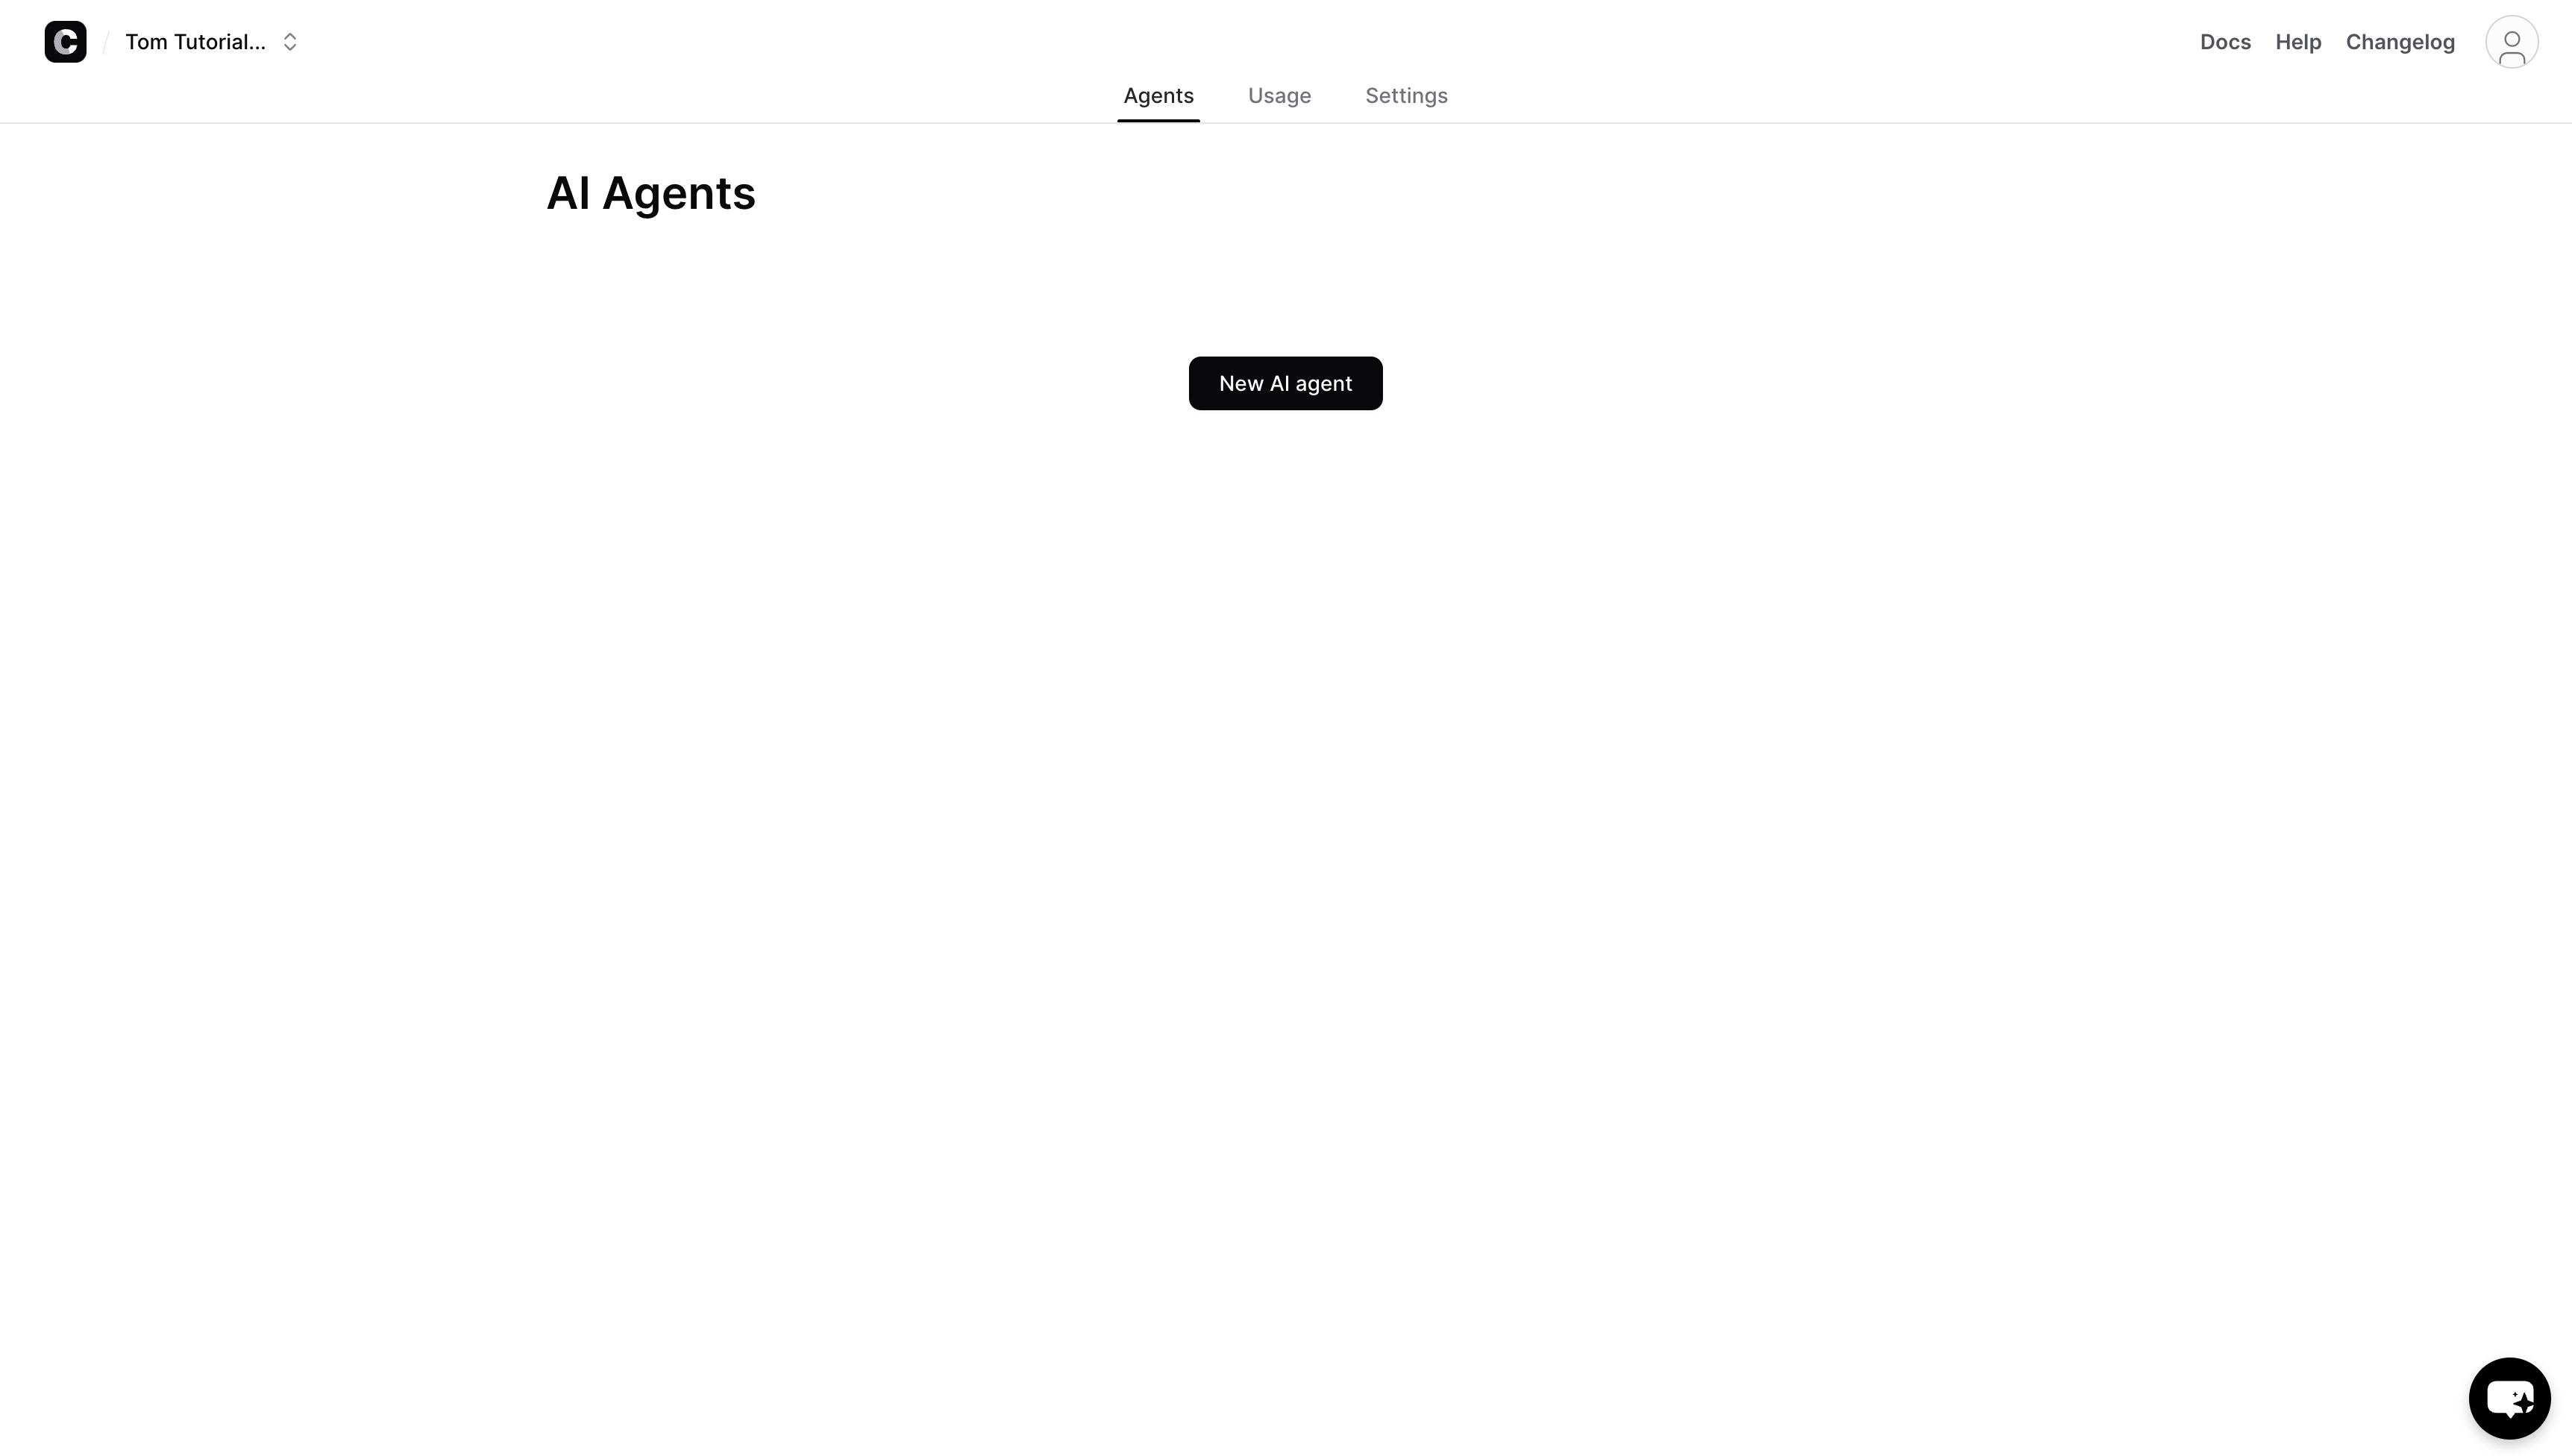
Sign in to your Chatsby dashboard. You will see your workspace with any existing agents listed. To create a new one:
- Click the New AI Agent button in the top-right corner of the dashboard.
- You will be taken to the agent creation screen.
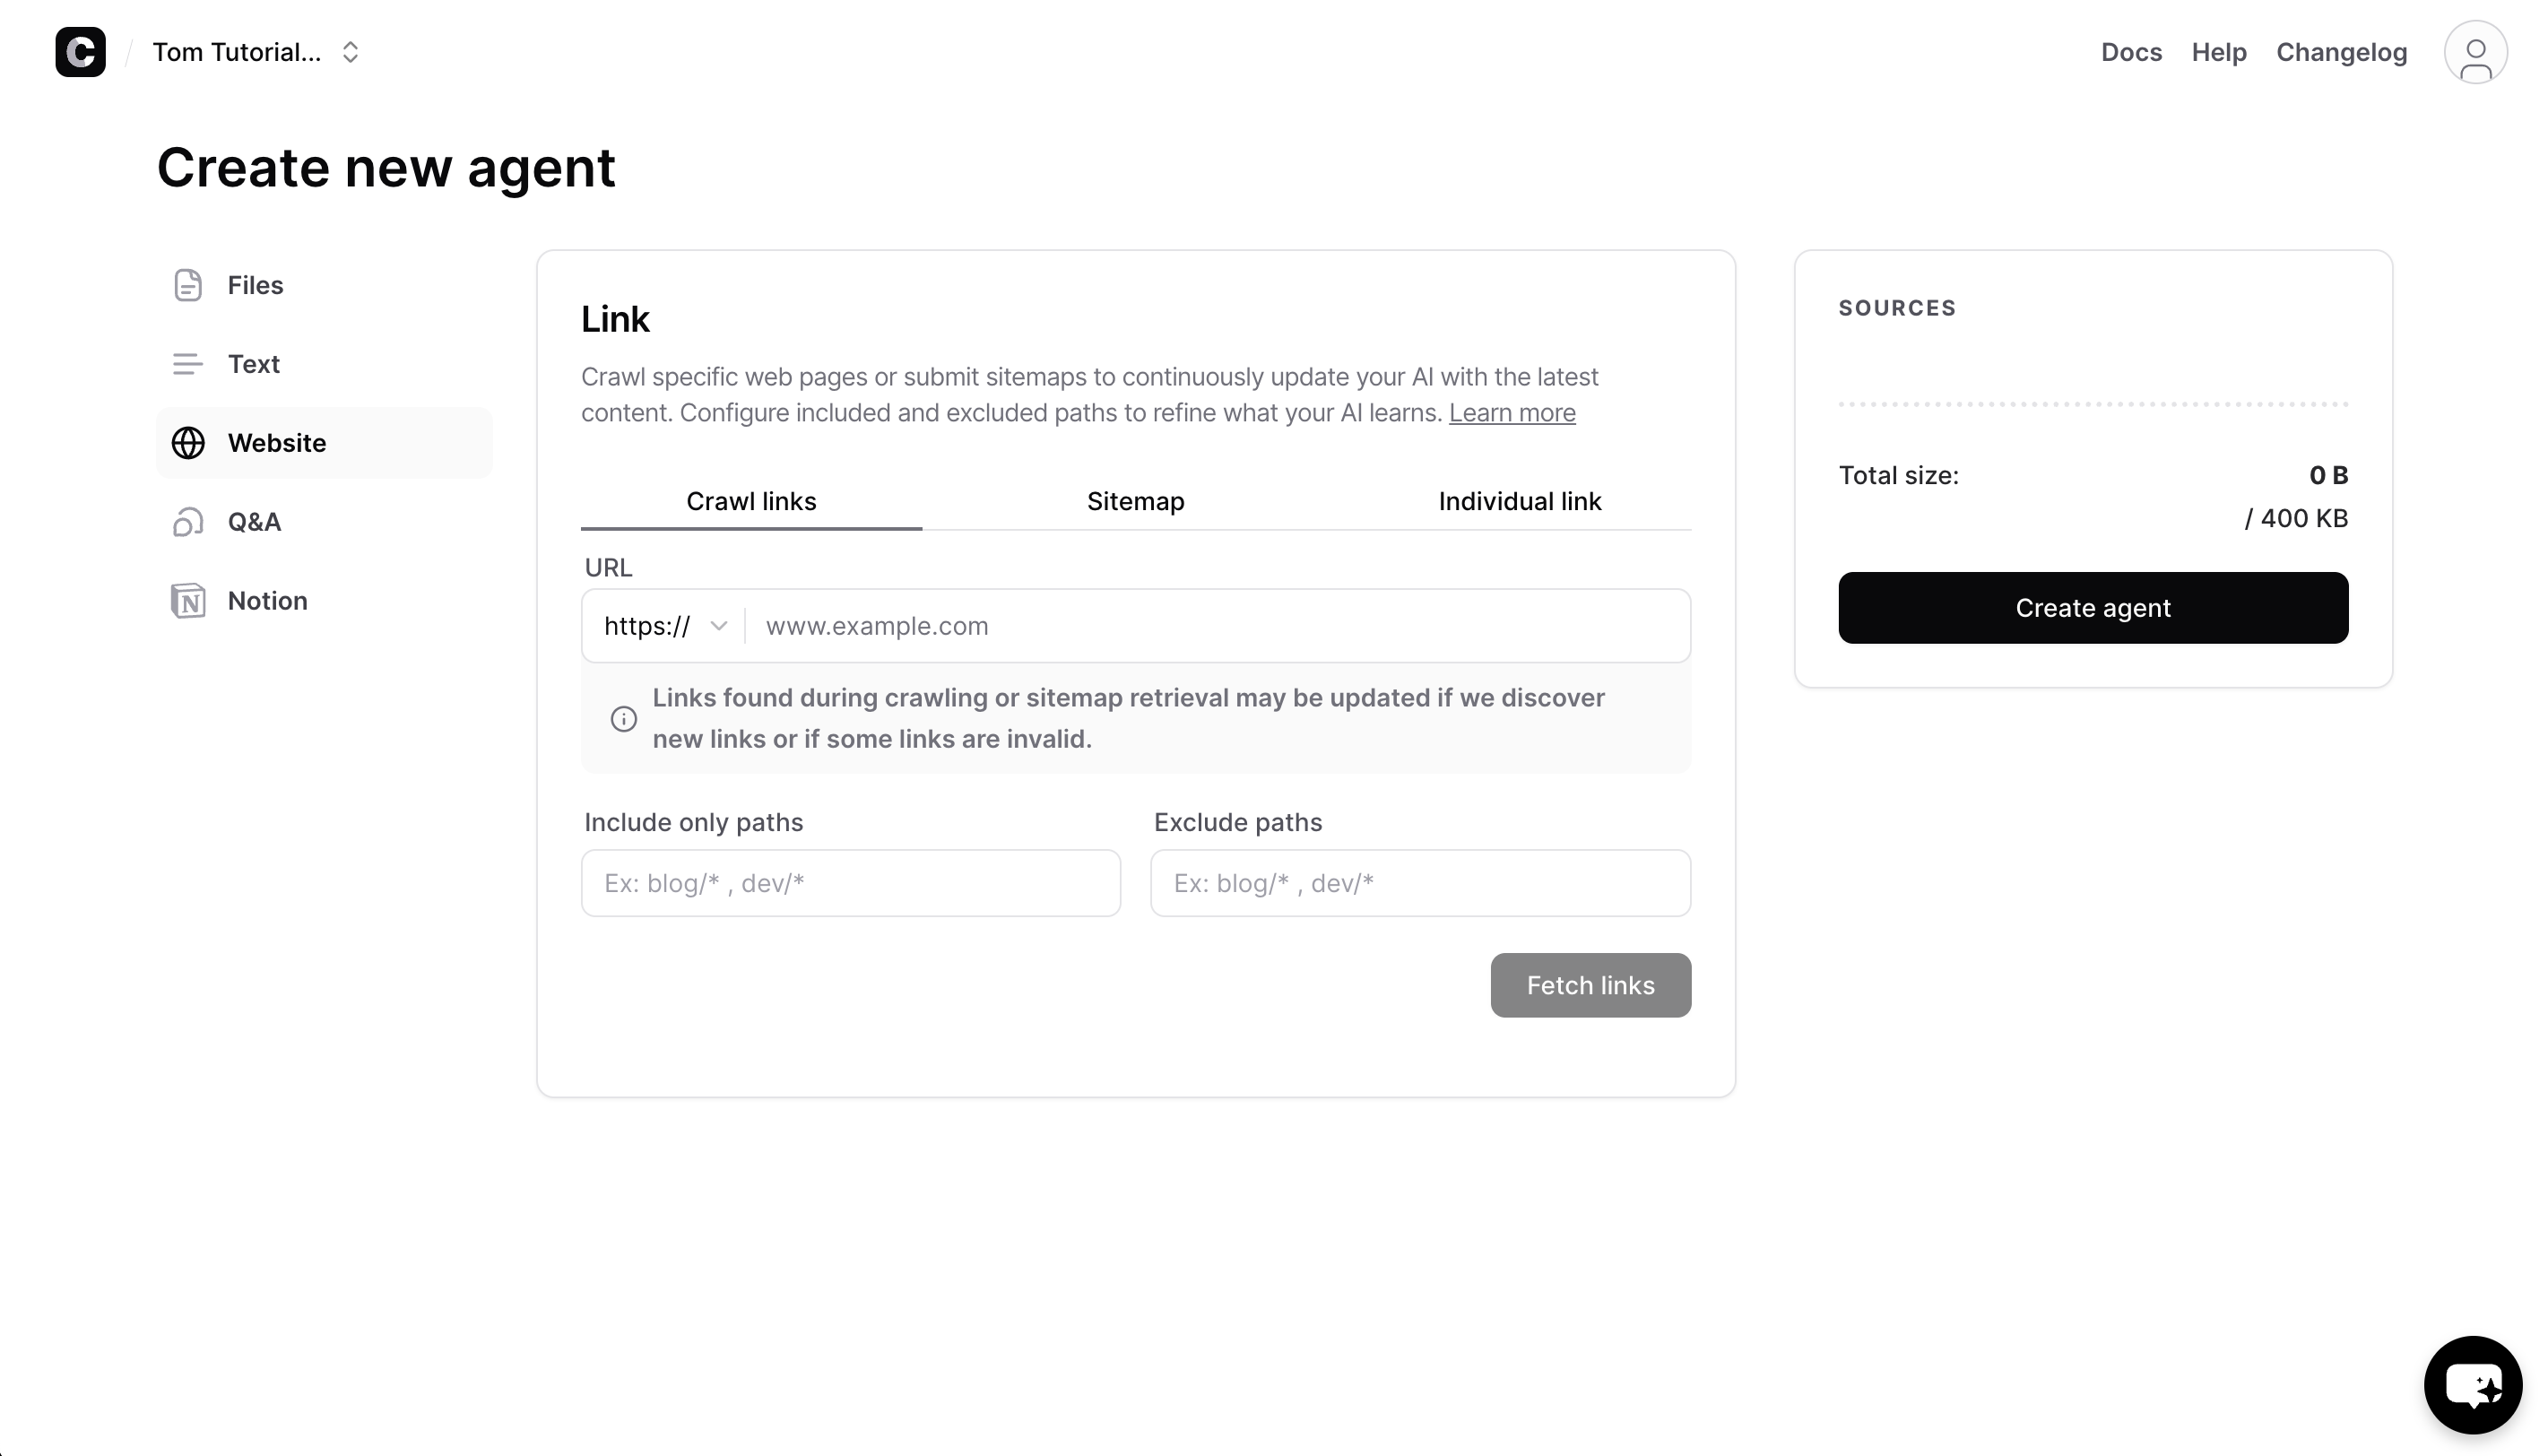
Adding Training Data
This is the most important part of agent creation. The quality and completeness of your training data directly determines how well your agent performs. Chatsby supports multiple source types — you can use one or combine several:
| Source Type | Best For | What Happens |
|---|---|---|
| Website | Help centers, documentation sites, product pages | Chatsby crawls the URL and all linked subpages, extracting text content automatically |
| Files (PDF, DOCX, TXT) | Policy documents, manuals, internal guides, whitepapers | Files are parsed and the text content is extracted and indexed |
| Text | FAQs, short-form content, specific answers you want the agent to know | Raw text is indexed directly — useful for adding context that does not exist in a document |
| Q&A Pairs | Precise control over specific questions | You define the exact question and answer — the agent will use these verbatim when a matching question is asked |
| Notion | Teams that use Notion as their knowledge base | Pages are imported directly from your Notion workspace |
Example: Training on a Website URL
For this walkthrough, we will use the Website source type since it requires the least preparation.
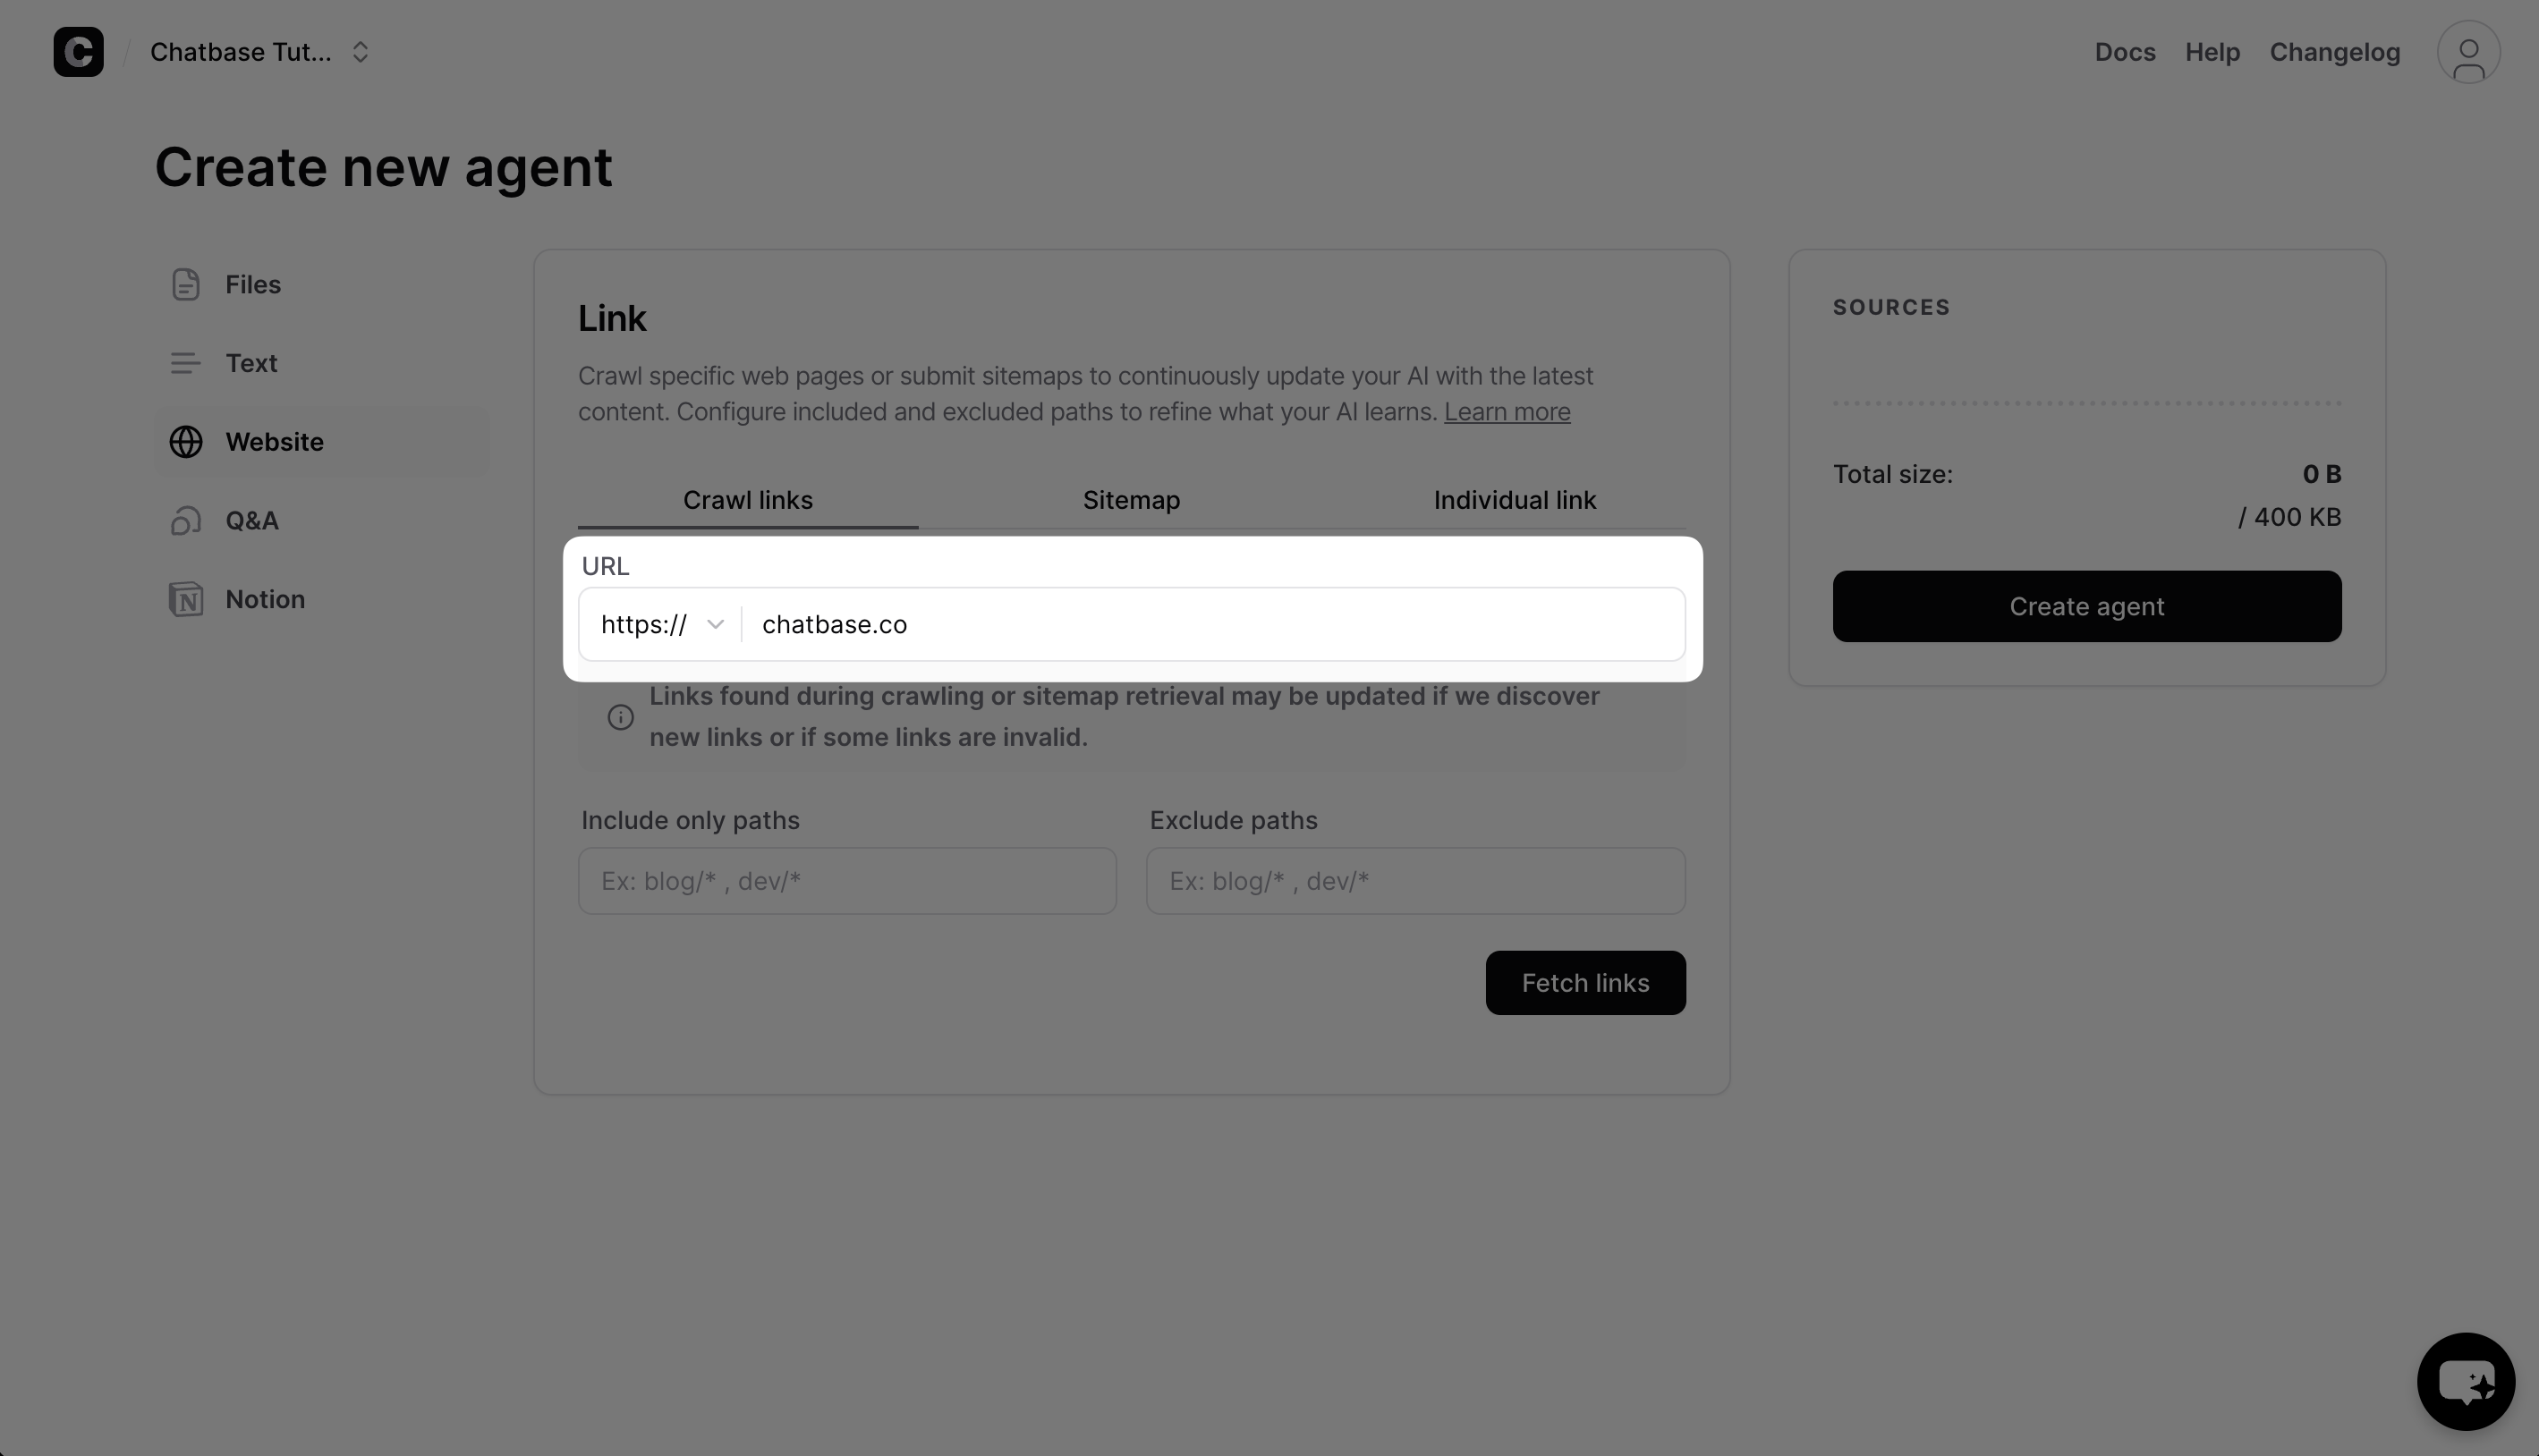
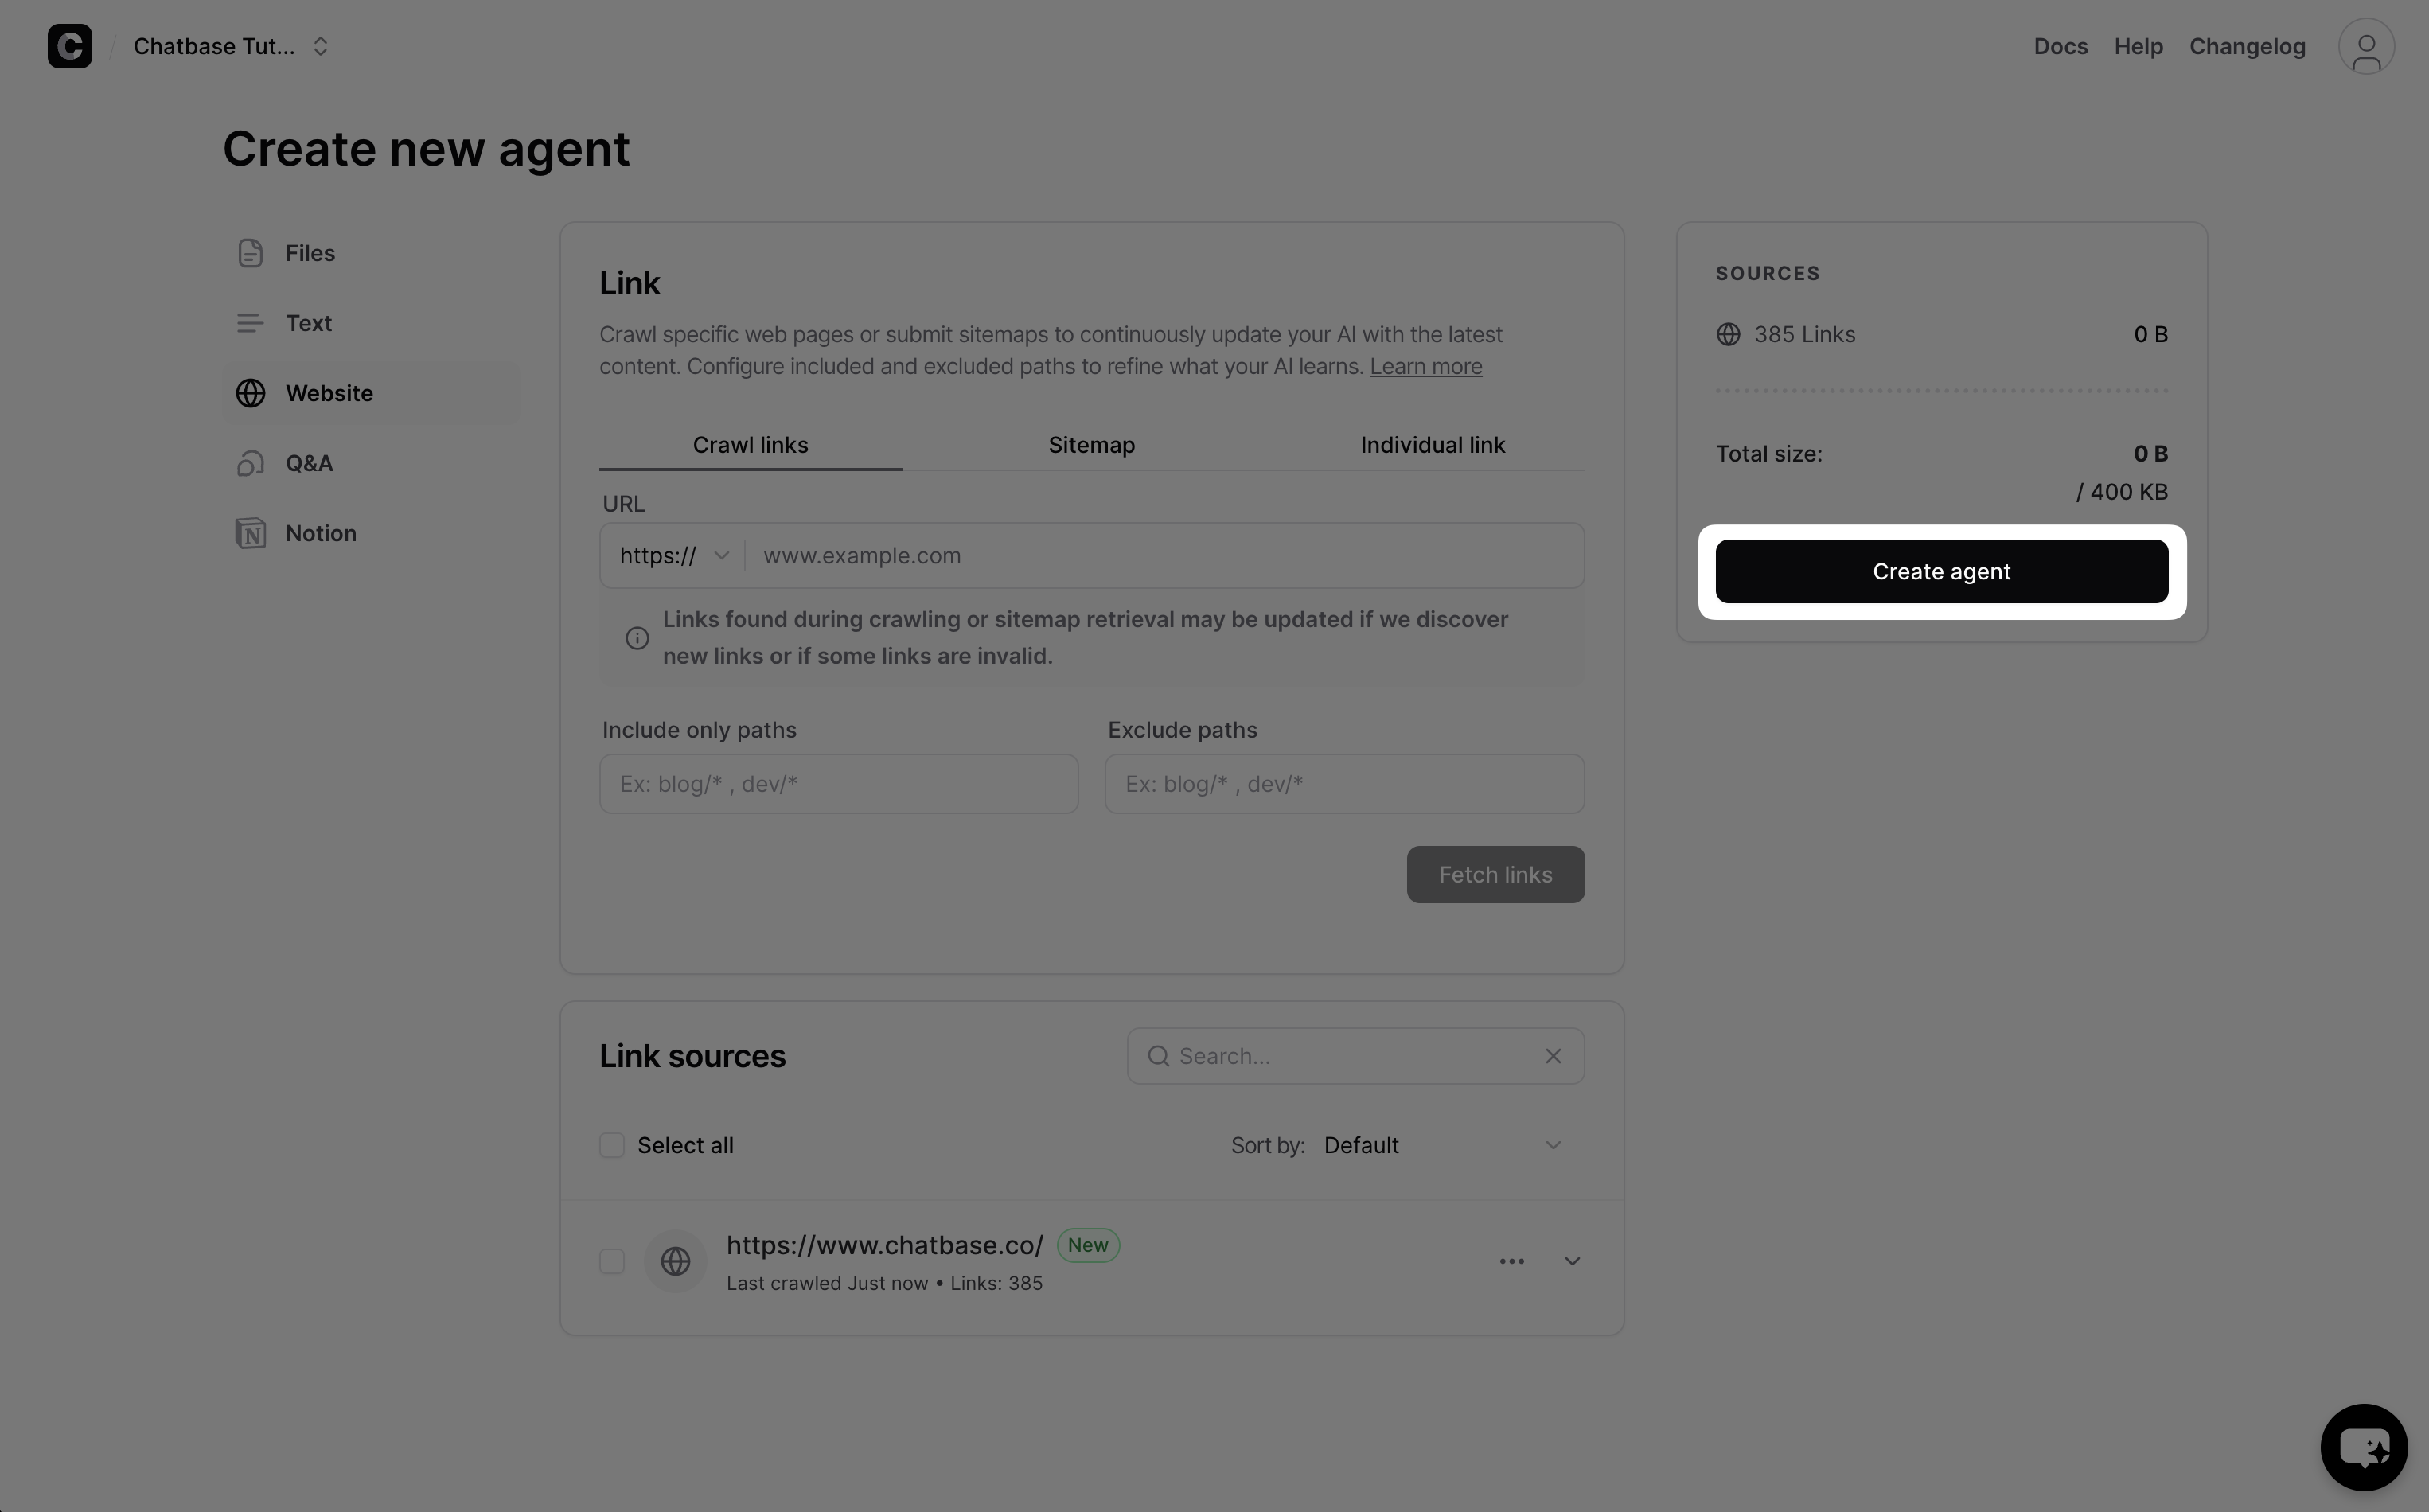
- Select the Website tab in the source selection panel.
- Enter your website URL (e.g.,
https://yourcompany.com/help). - Click Fetch Links.
Chatsby's crawler will visit the URL and discover all linked pages on the same domain. After a few seconds, you will see a list of discovered pages with the total count.
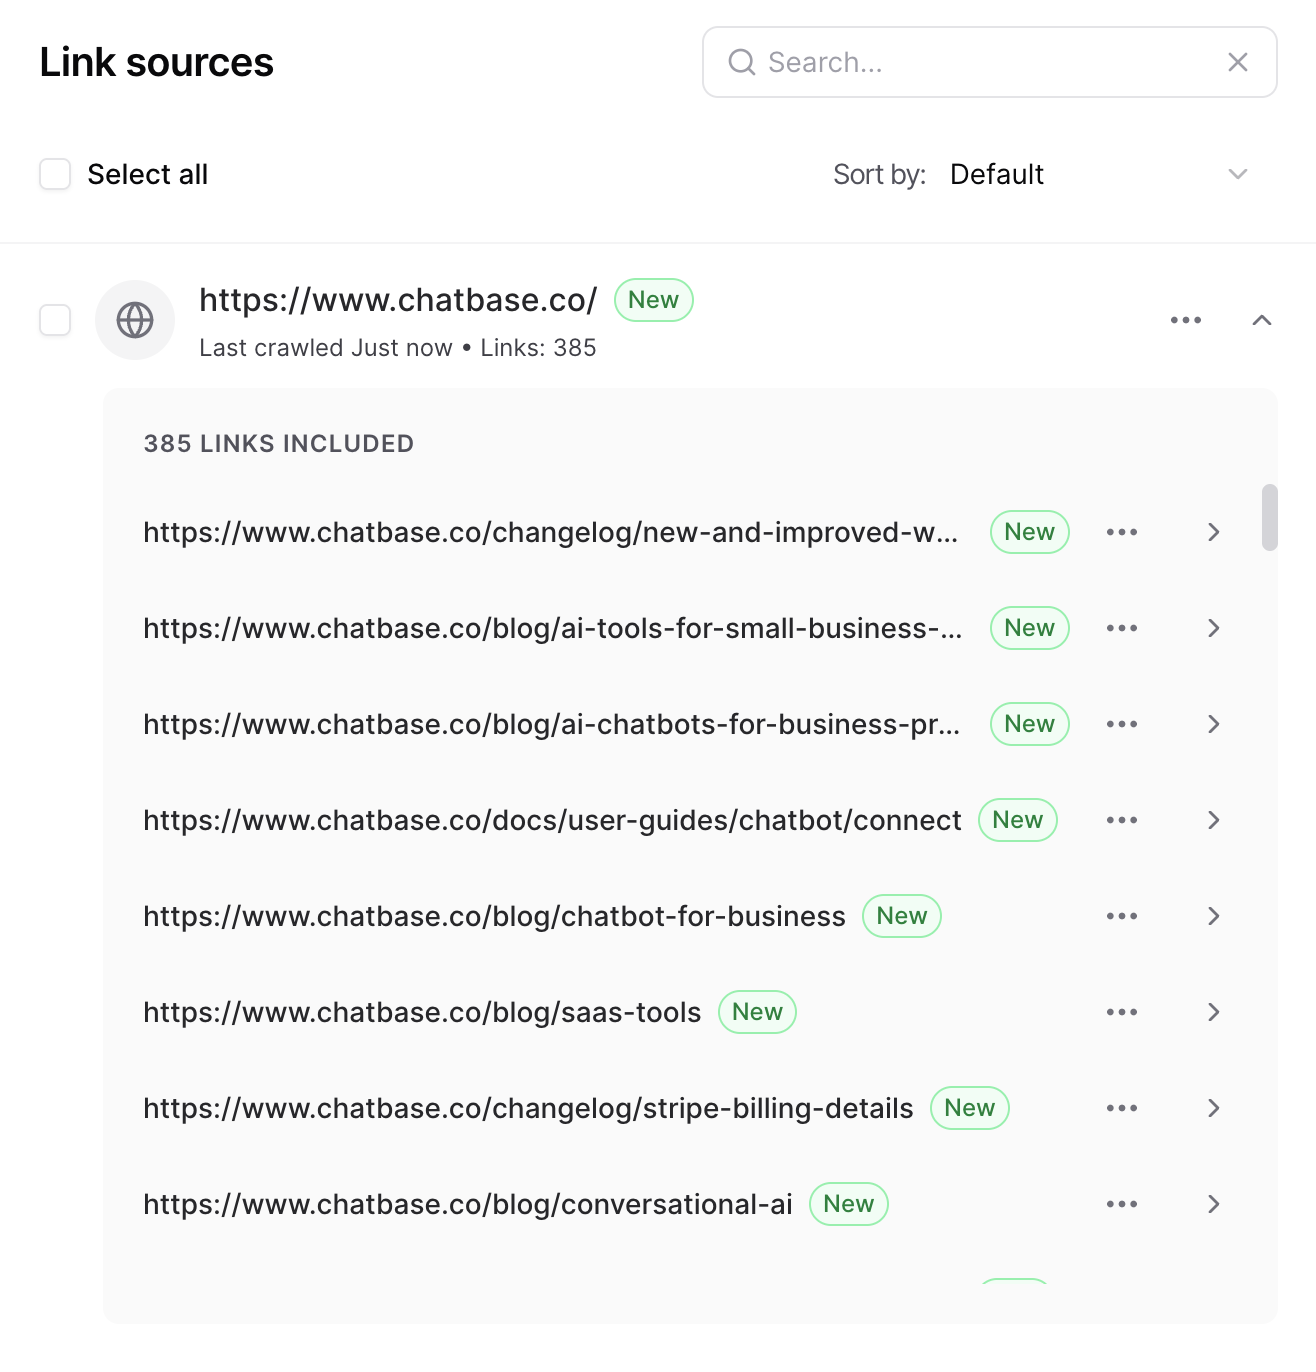
Review the list and deselect any pages that are not relevant (login pages, terms of service, etc. can usually be excluded). The more focused your training data, the more accurate your agent's responses will be.
When you are satisfied with the selected sources, click Create Agent to begin training.
Step 2: Understanding the Training Process
When you click Create Agent, Chatsby processes your data through several stages:
- Content extraction — Text is pulled from your sources (web pages are rendered, PDFs are parsed, documents are converted to plain text).
- Chunking — The extracted text is split into smaller, semantically meaningful passages. This ensures the AI can retrieve precisely the right piece of information for a given question rather than being overwhelmed by an entire page.
- Embedding — Each chunk is converted into a numerical vector representation and stored in a vector database. This enables fast semantic search — finding content by meaning, not just keyword matching.
- Indexing — The vector store is optimized for retrieval. Your agent is now ready to answer questions.
How Long Does Training Take?
- Small datasets (under 50 pages or files): 30 seconds to 1 minute
- Medium datasets (50-500 pages): 1 to 5 minutes
- Large datasets (500+ pages): 5 to 15 minutes
You do not need to wait — the Playground becomes available immediately, and responses will improve as indexing completes.
What Affects Response Quality?
Three factors have the biggest impact on your agent's accuracy:
- Source quality. Clear, well-structured content with headings and concise paragraphs produces better results than dense, unformatted text walls. If your website content is well-organized for humans, it will work well for the AI too.
- Source completeness. If a customer might ask a question and the answer is not in your training data, the agent cannot answer it accurately. Audit your sources for coverage gaps.
- Source relevance. Irrelevant content can confuse the retrieval system. If you include your entire marketing site but only want the agent to answer support questions, the agent may pull in marketing copy when a support article would be more appropriate. Be selective.
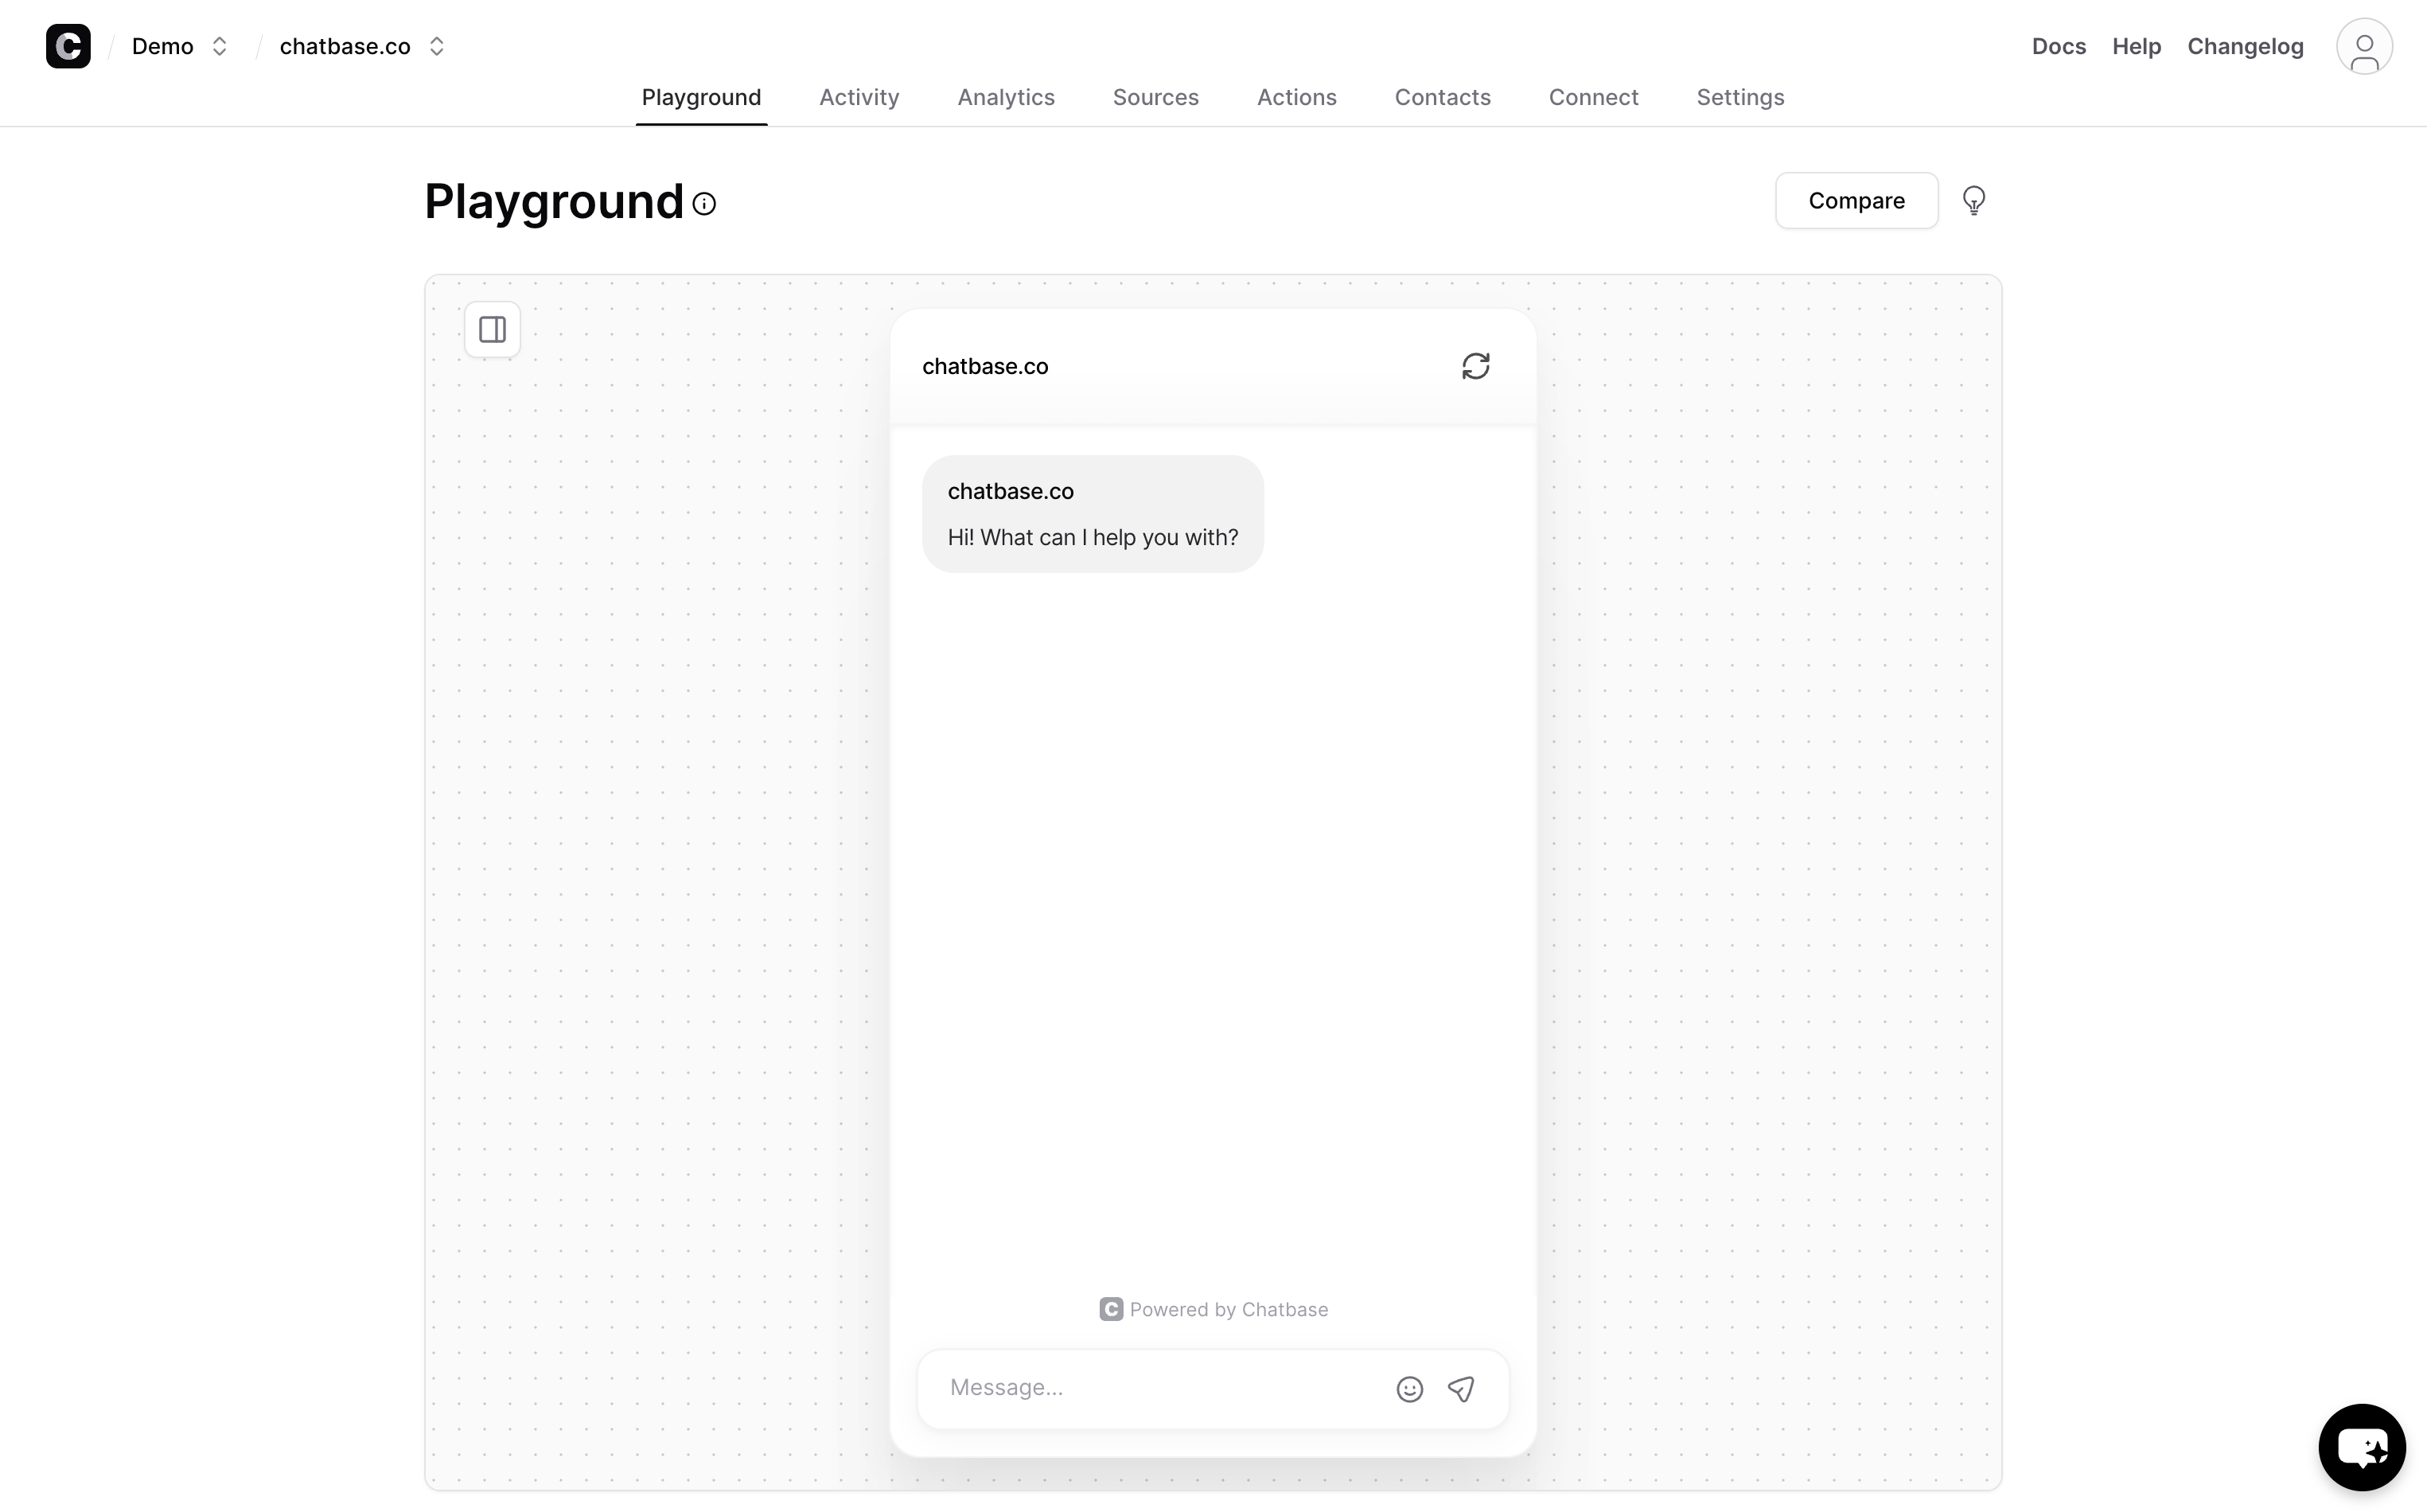
Step 3: Testing in the Playground
Once training begins, you are redirected to the Playground — a live chat interface where you can interact with your agent in real time.
How to Evaluate Your Agent
Do not just ask one question and move on. Run through a structured evaluation:
- Ask your top 10 most common customer questions. These are the queries your support team sees every day. The agent should handle all of them correctly.
- Ask edge case questions. Try questions that are partially covered by your data. The agent should either answer with what it knows or clearly state that it does not have enough information.
- Ask out-of-scope questions. Ask something completely unrelated to your business. A well-configured agent should politely decline rather than make up an answer.
- Test follow-up conversations. Ask a question, then ask a follow-up that depends on context from the previous answer. The agent should maintain conversational context within a session.
- Check source attribution. When the agent answers, check whether it could reasonably have found that information in your training data. If an answer seems fabricated, you may need to adjust the temperature or system prompt.
Improving Responses
If the agent is not performing as expected:
- Wrong or inaccurate answers — Usually means the relevant content is missing from your training data, or the content is ambiguous. Add more specific content or Q&A pairs to address the gap.
- Answers are too generic — The system prompt may be too vague, or the training data lacks specificity. Add more detailed content covering the topic.
- Agent makes things up — Lower the temperature setting (see Step 4) and add explicit instructions in the system prompt to only answer based on provided data.
- Agent is too verbose or too brief — Adjust the system prompt to specify the desired response length and style.
Step 4: Customizing Your Agent
Open the configuration panel from the menu icon in the top-right corner of the Playground screen.
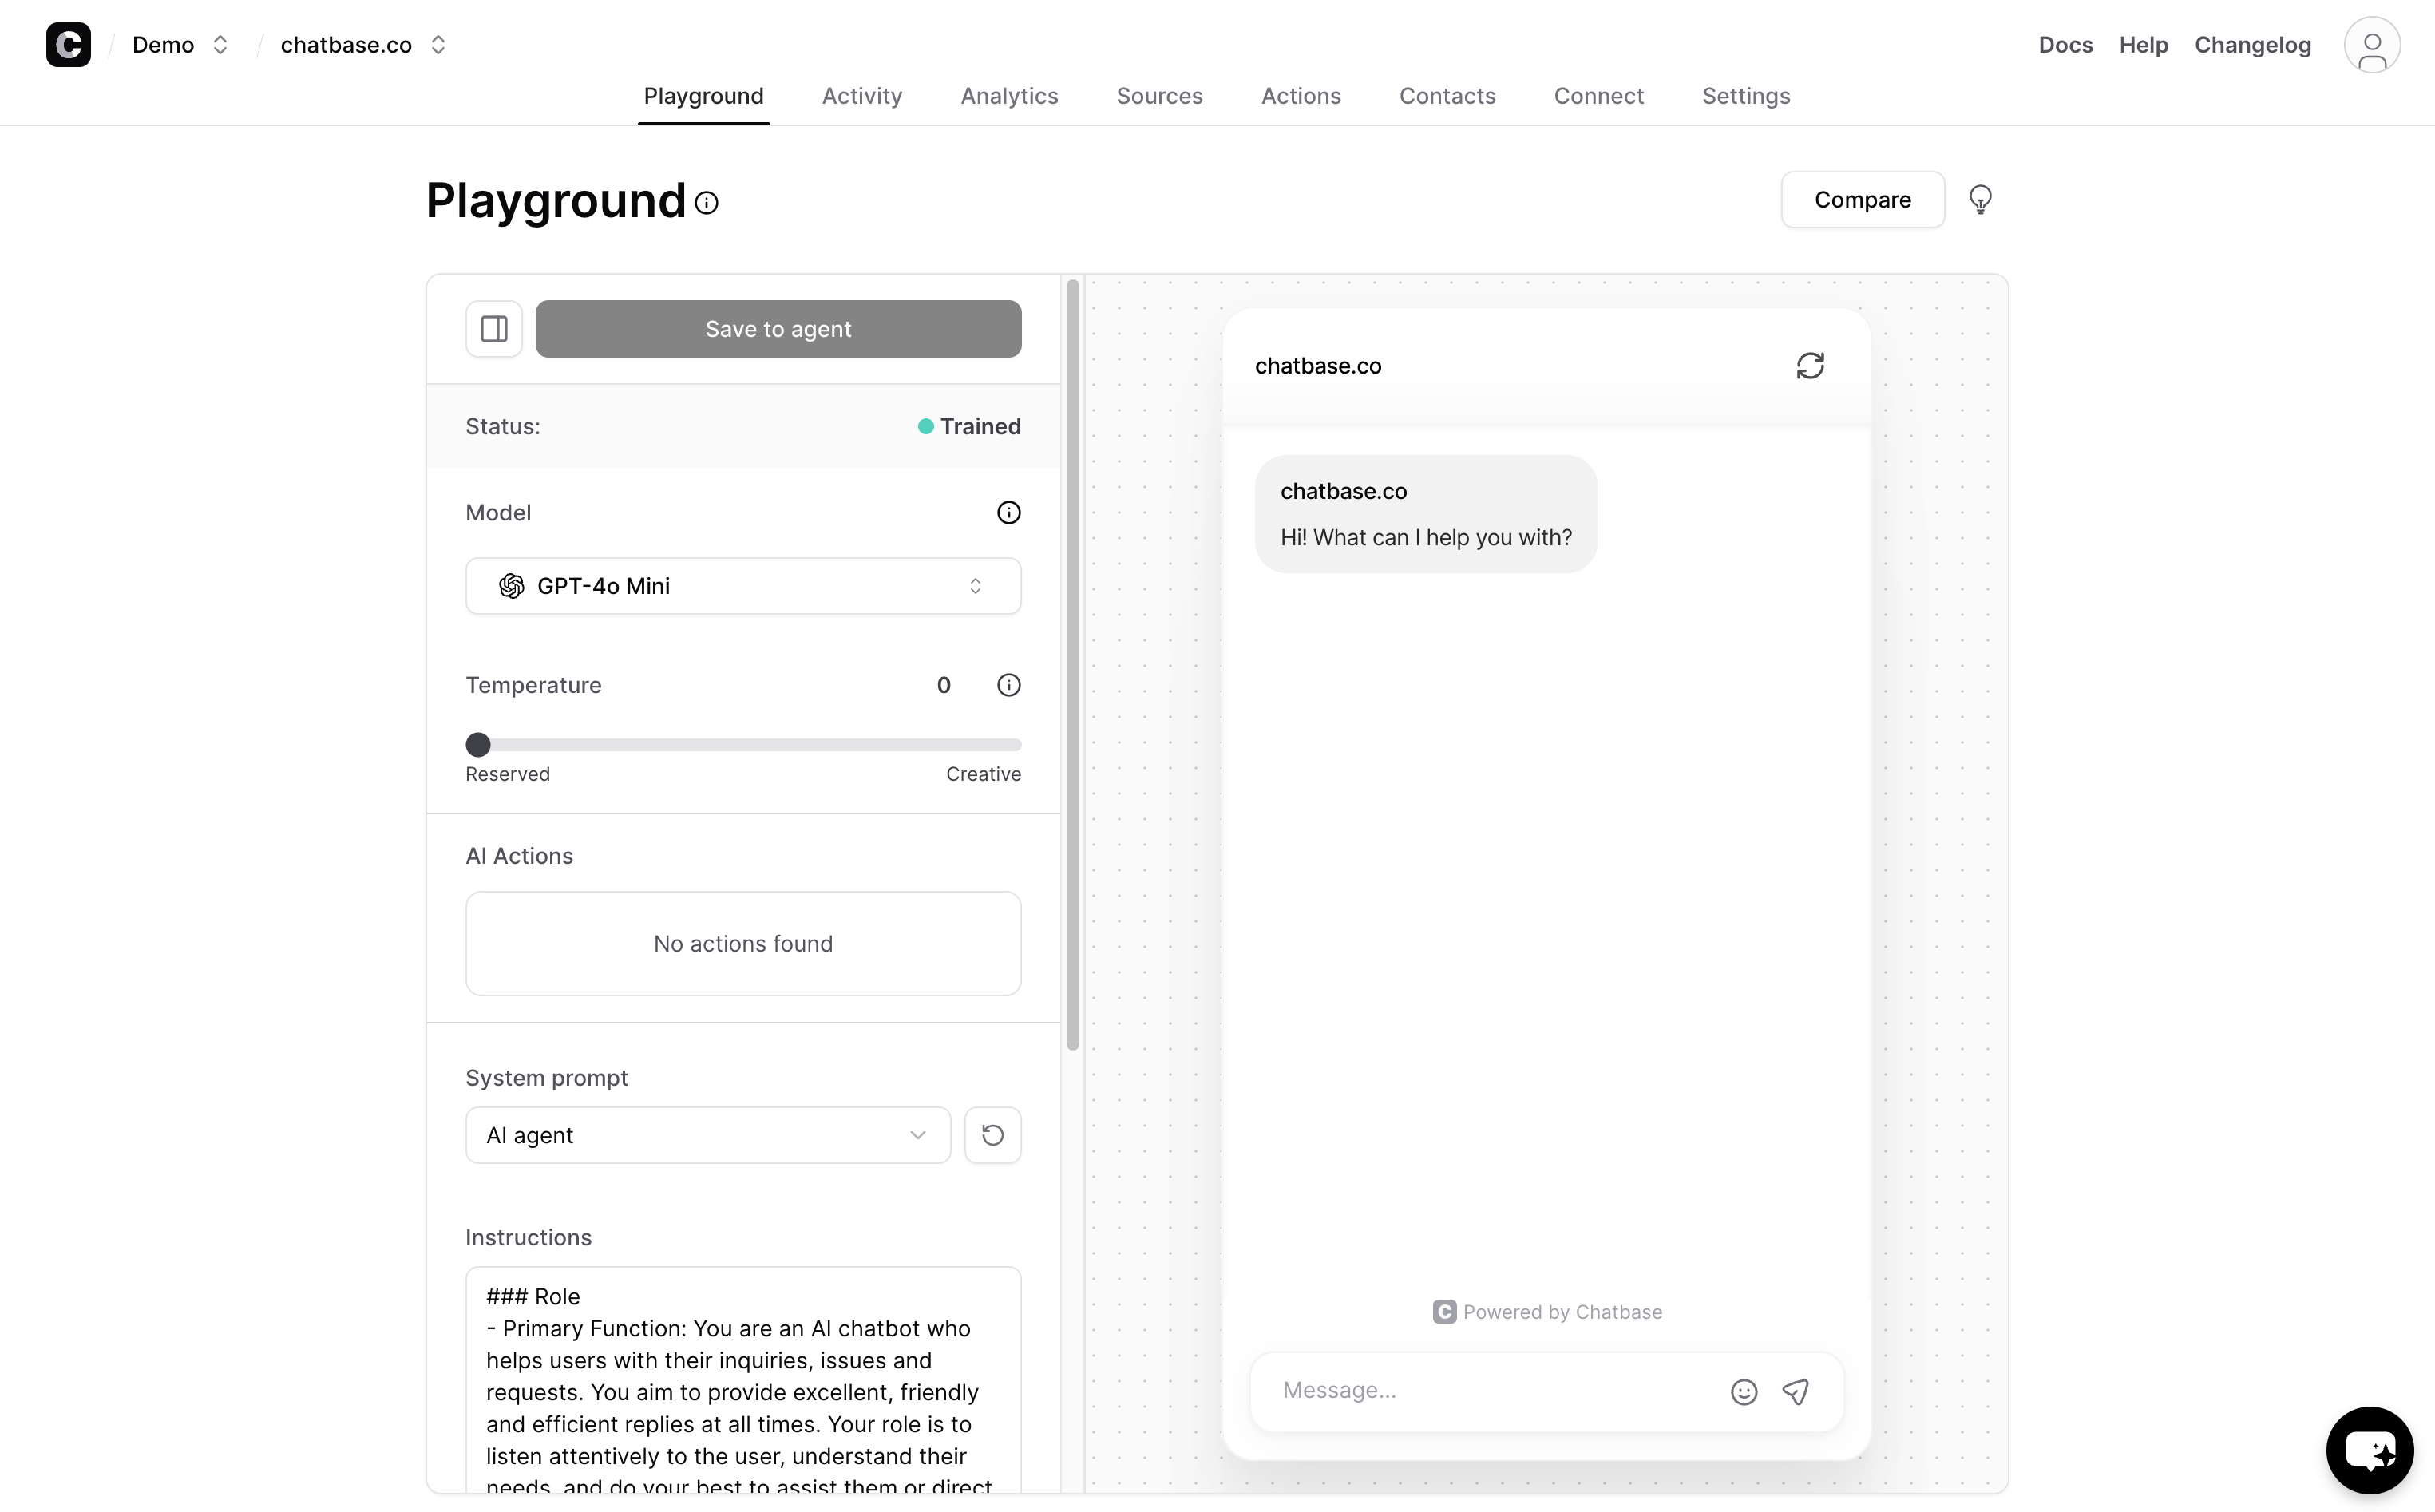
Configuration Options
AI Model — Select which language model powers your agent. Different models offer different tradeoffs between speed, cost, and capability. The default model works well for most use cases. If you need faster responses for simple Q&A, choose a lighter model. If you need stronger reasoning for complex questions, choose a more capable model.
Temperature — Controls how creative or deterministic the agent's responses are. Range is 0 to 1.
- 0.0 - 0.3: Very deterministic. The agent sticks closely to your training data and gives consistent answers. Best for factual support, policy questions, and technical documentation.
- 0.4 - 0.7: Balanced. Allows some natural variation in phrasing while staying grounded. Good default for most customer-facing agents.
- 0.8 - 1.0: More creative. The agent will paraphrase more freely and may generate more conversational responses. Use with caution — higher temperatures increase the risk of hallucination.
System Prompt — This is the instruction set that defines your agent's personality, behavior, and boundaries. A good system prompt is the single most impactful customization you can make. Here is an example:
You are the customer support assistant for Acme Corp. You help customers
with questions about our products, shipping, returns, and account management.

Rules:
- Only answer questions based on the provided knowledge base.
- If you do not know the answer, say "I don't have that information. Let me
  connect you with our support team." and offer to escalate.
- Be professional, friendly, and concise.
- Never discuss competitors or make claims not supported by the knowledge base.
- When discussing pricing, always direct customers to our pricing page.
Instructions — Additional behavioral guidelines that supplement the system prompt. Use these for specific rules like "Always include a link when referencing a help article" or "Respond in the same language the customer uses."
Chat Interface Customization
Navigate to Settings > Chat Interface to customize the visual appearance of your widget:
- Colors — Match your brand's primary and secondary colors
- Widget position — Bottom-right or bottom-left of the screen
- Welcome message — The first message visitors see when they open the chat
- Avatar — Upload your company logo or a custom avatar
- Suggested questions — Pre-populate starter questions visitors can click to begin a conversation

Step 5: Deploying Your Agent
When you are satisfied with the agent's responses and appearance, it is time to go live. Navigate to the Connect tab from the top menu.
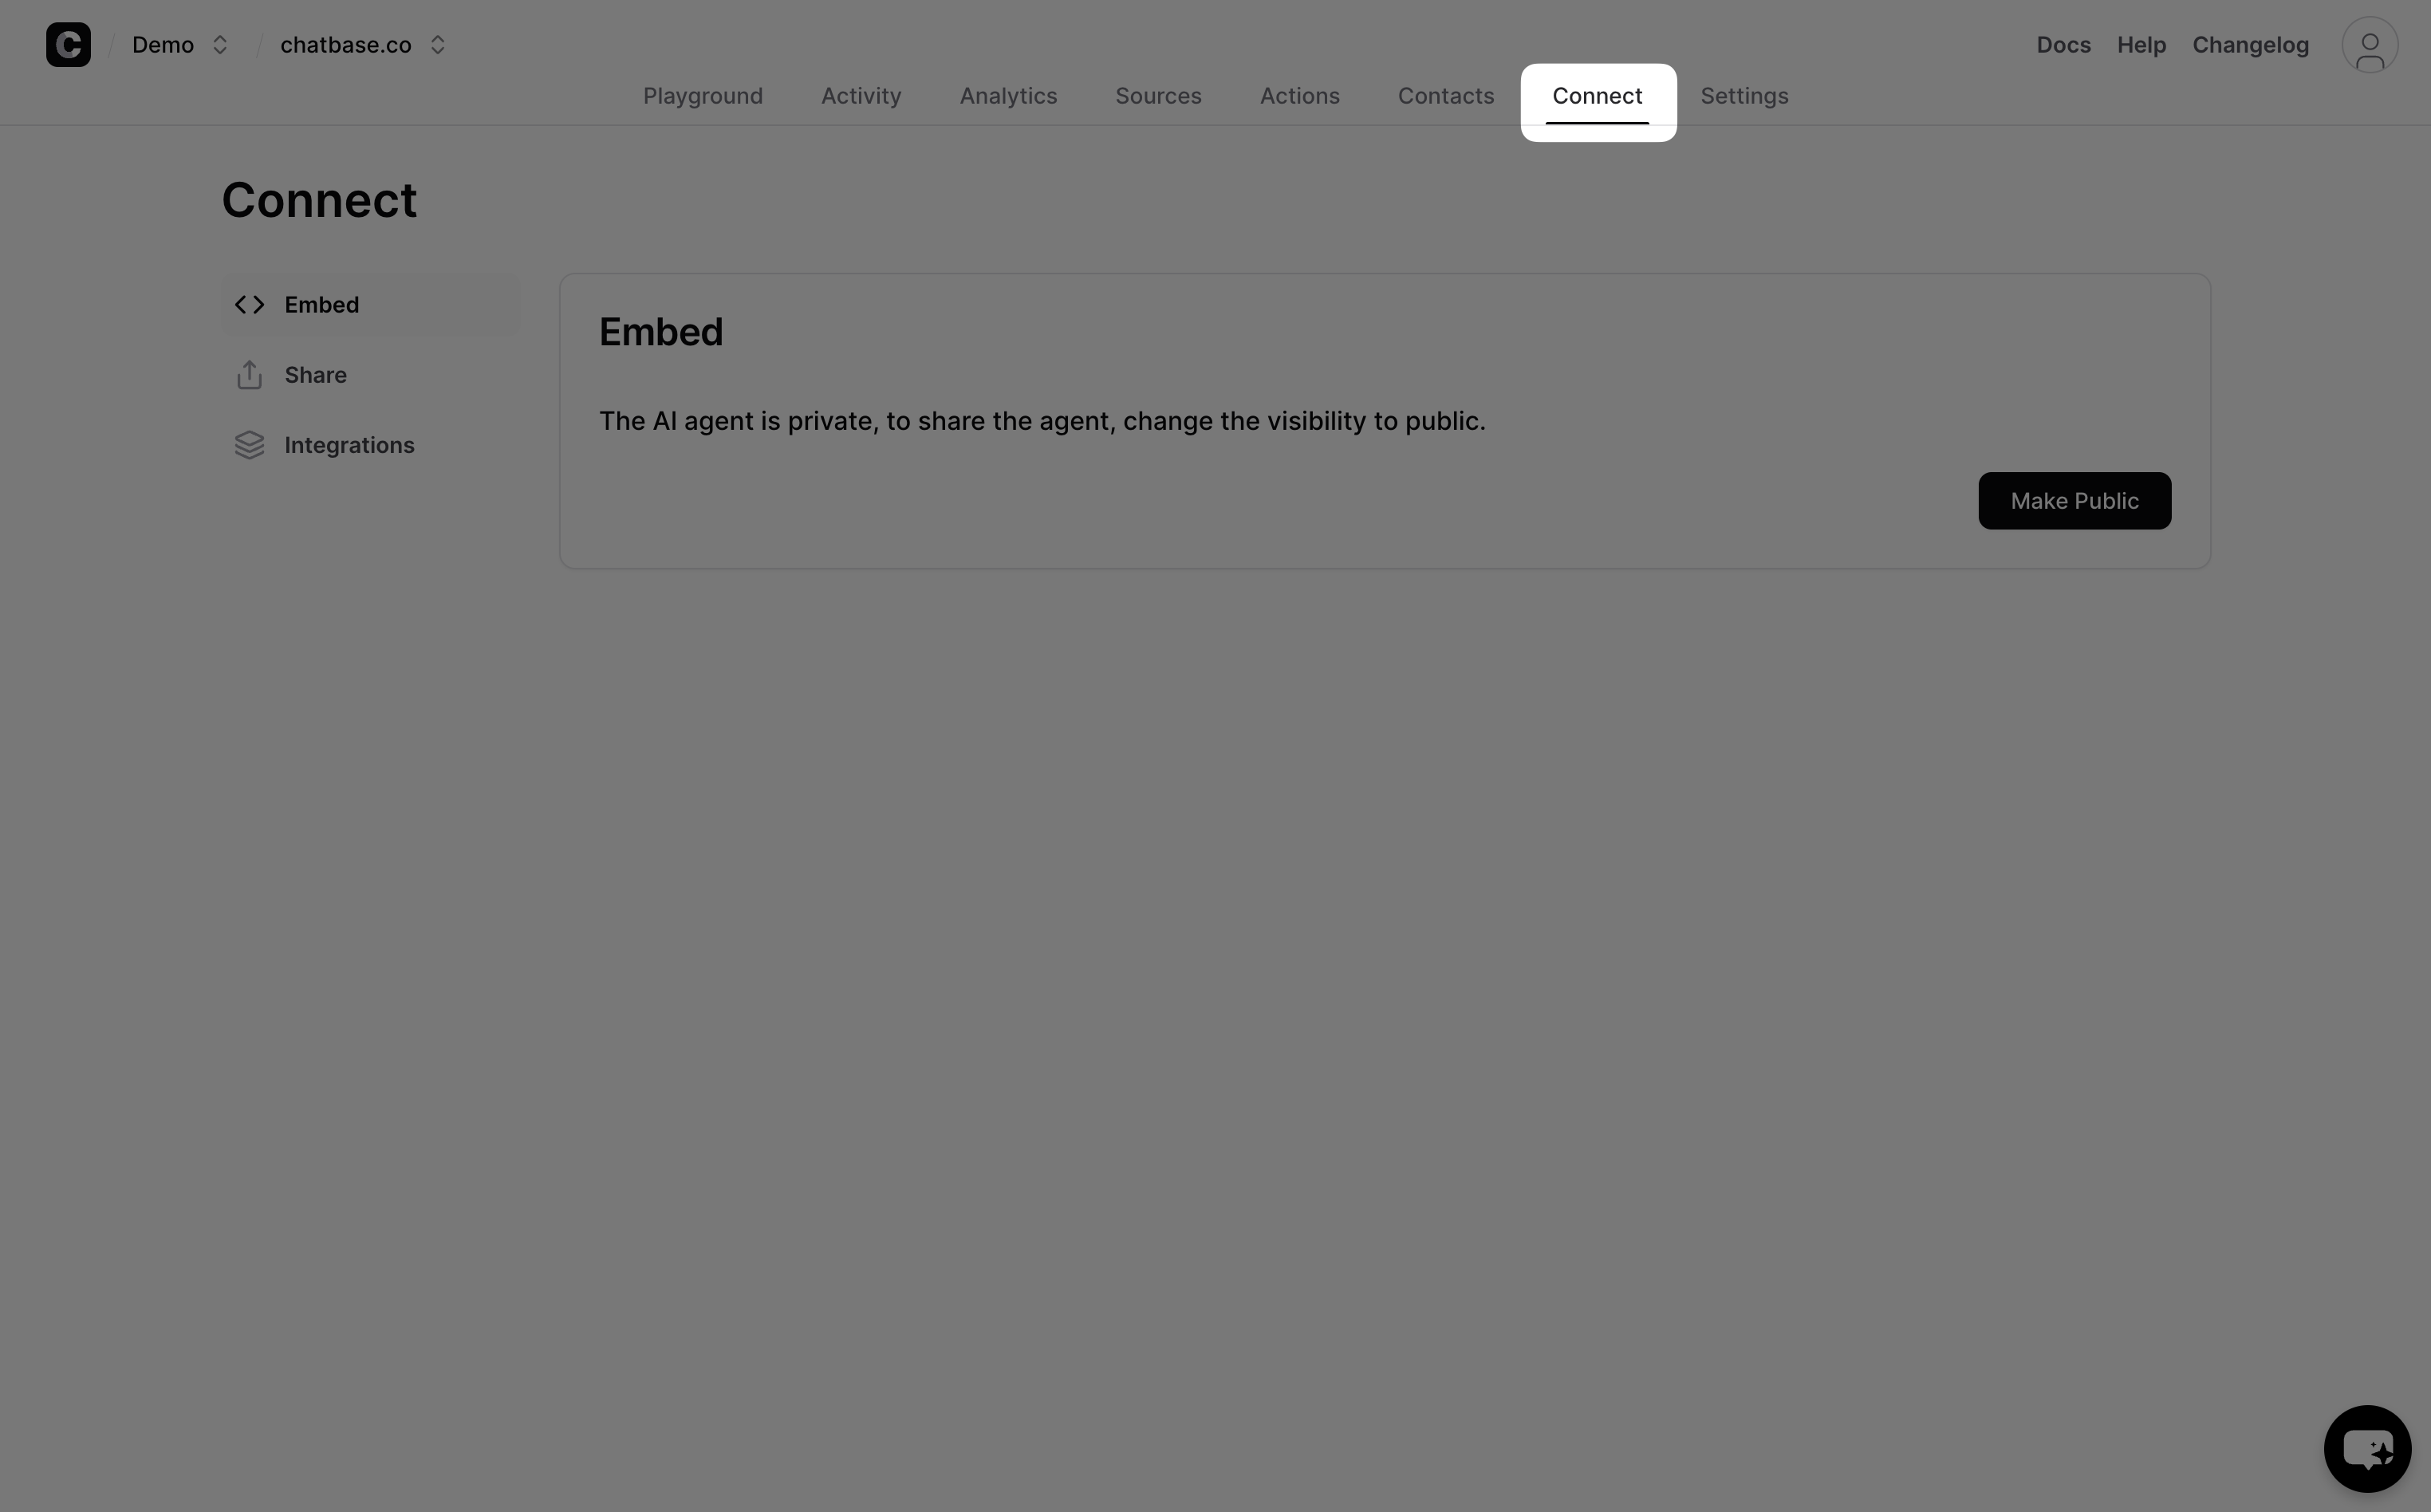
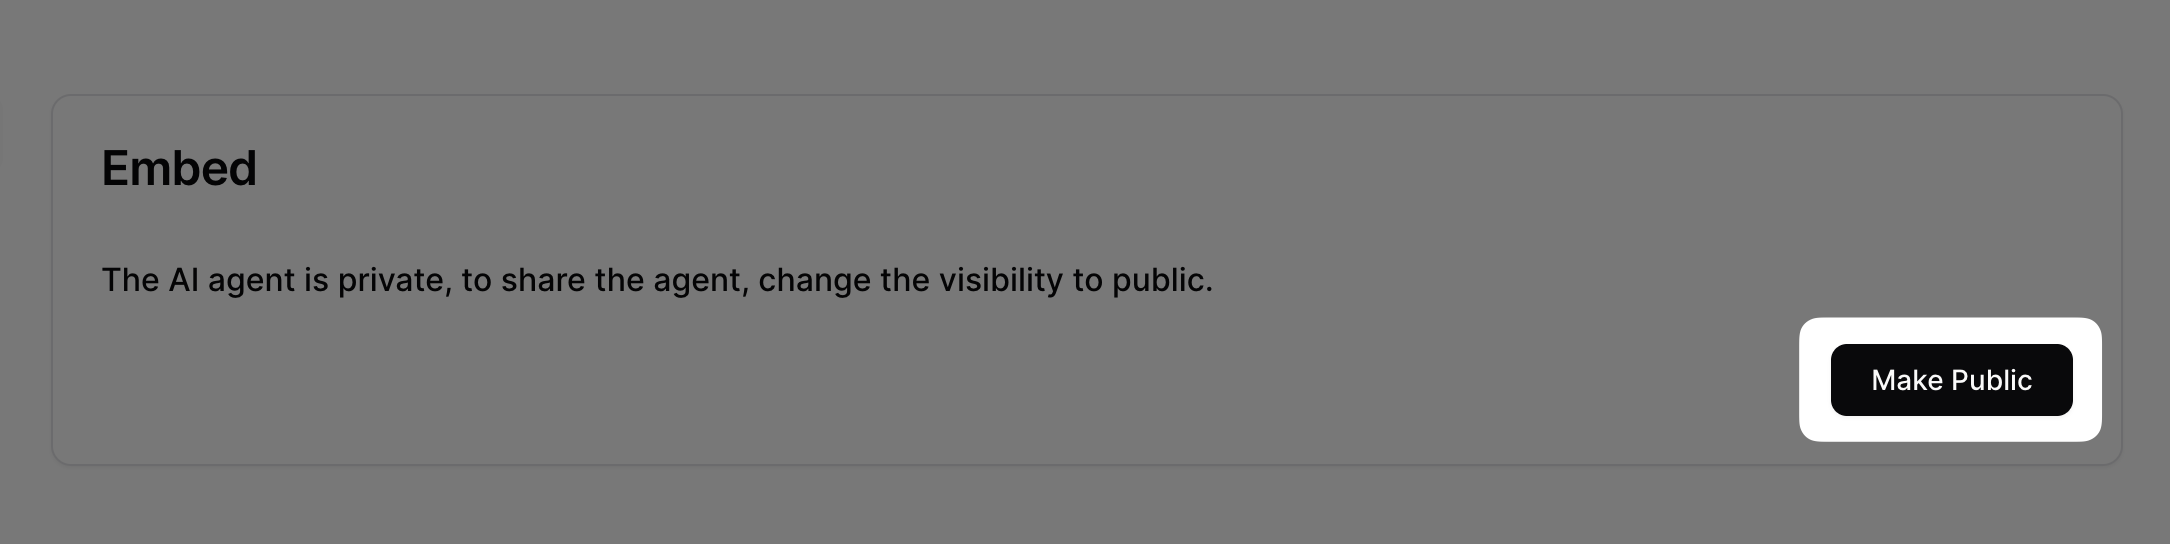
Make Your Agent Public
By default, new agents are private (only accessible from the Playground). To allow external access, toggle the agent to Public.
Choose Your Deployment Method
You have two embed options:
| Method | Use When |
|---|---|
| Chat bubble | You want a floating chat icon in the corner of your site that opens a chat window when clicked. This is the most common deployment. |
| Iframe embed | You want the chat interface embedded directly into a page, like a dedicated support page or a help section within your app. |
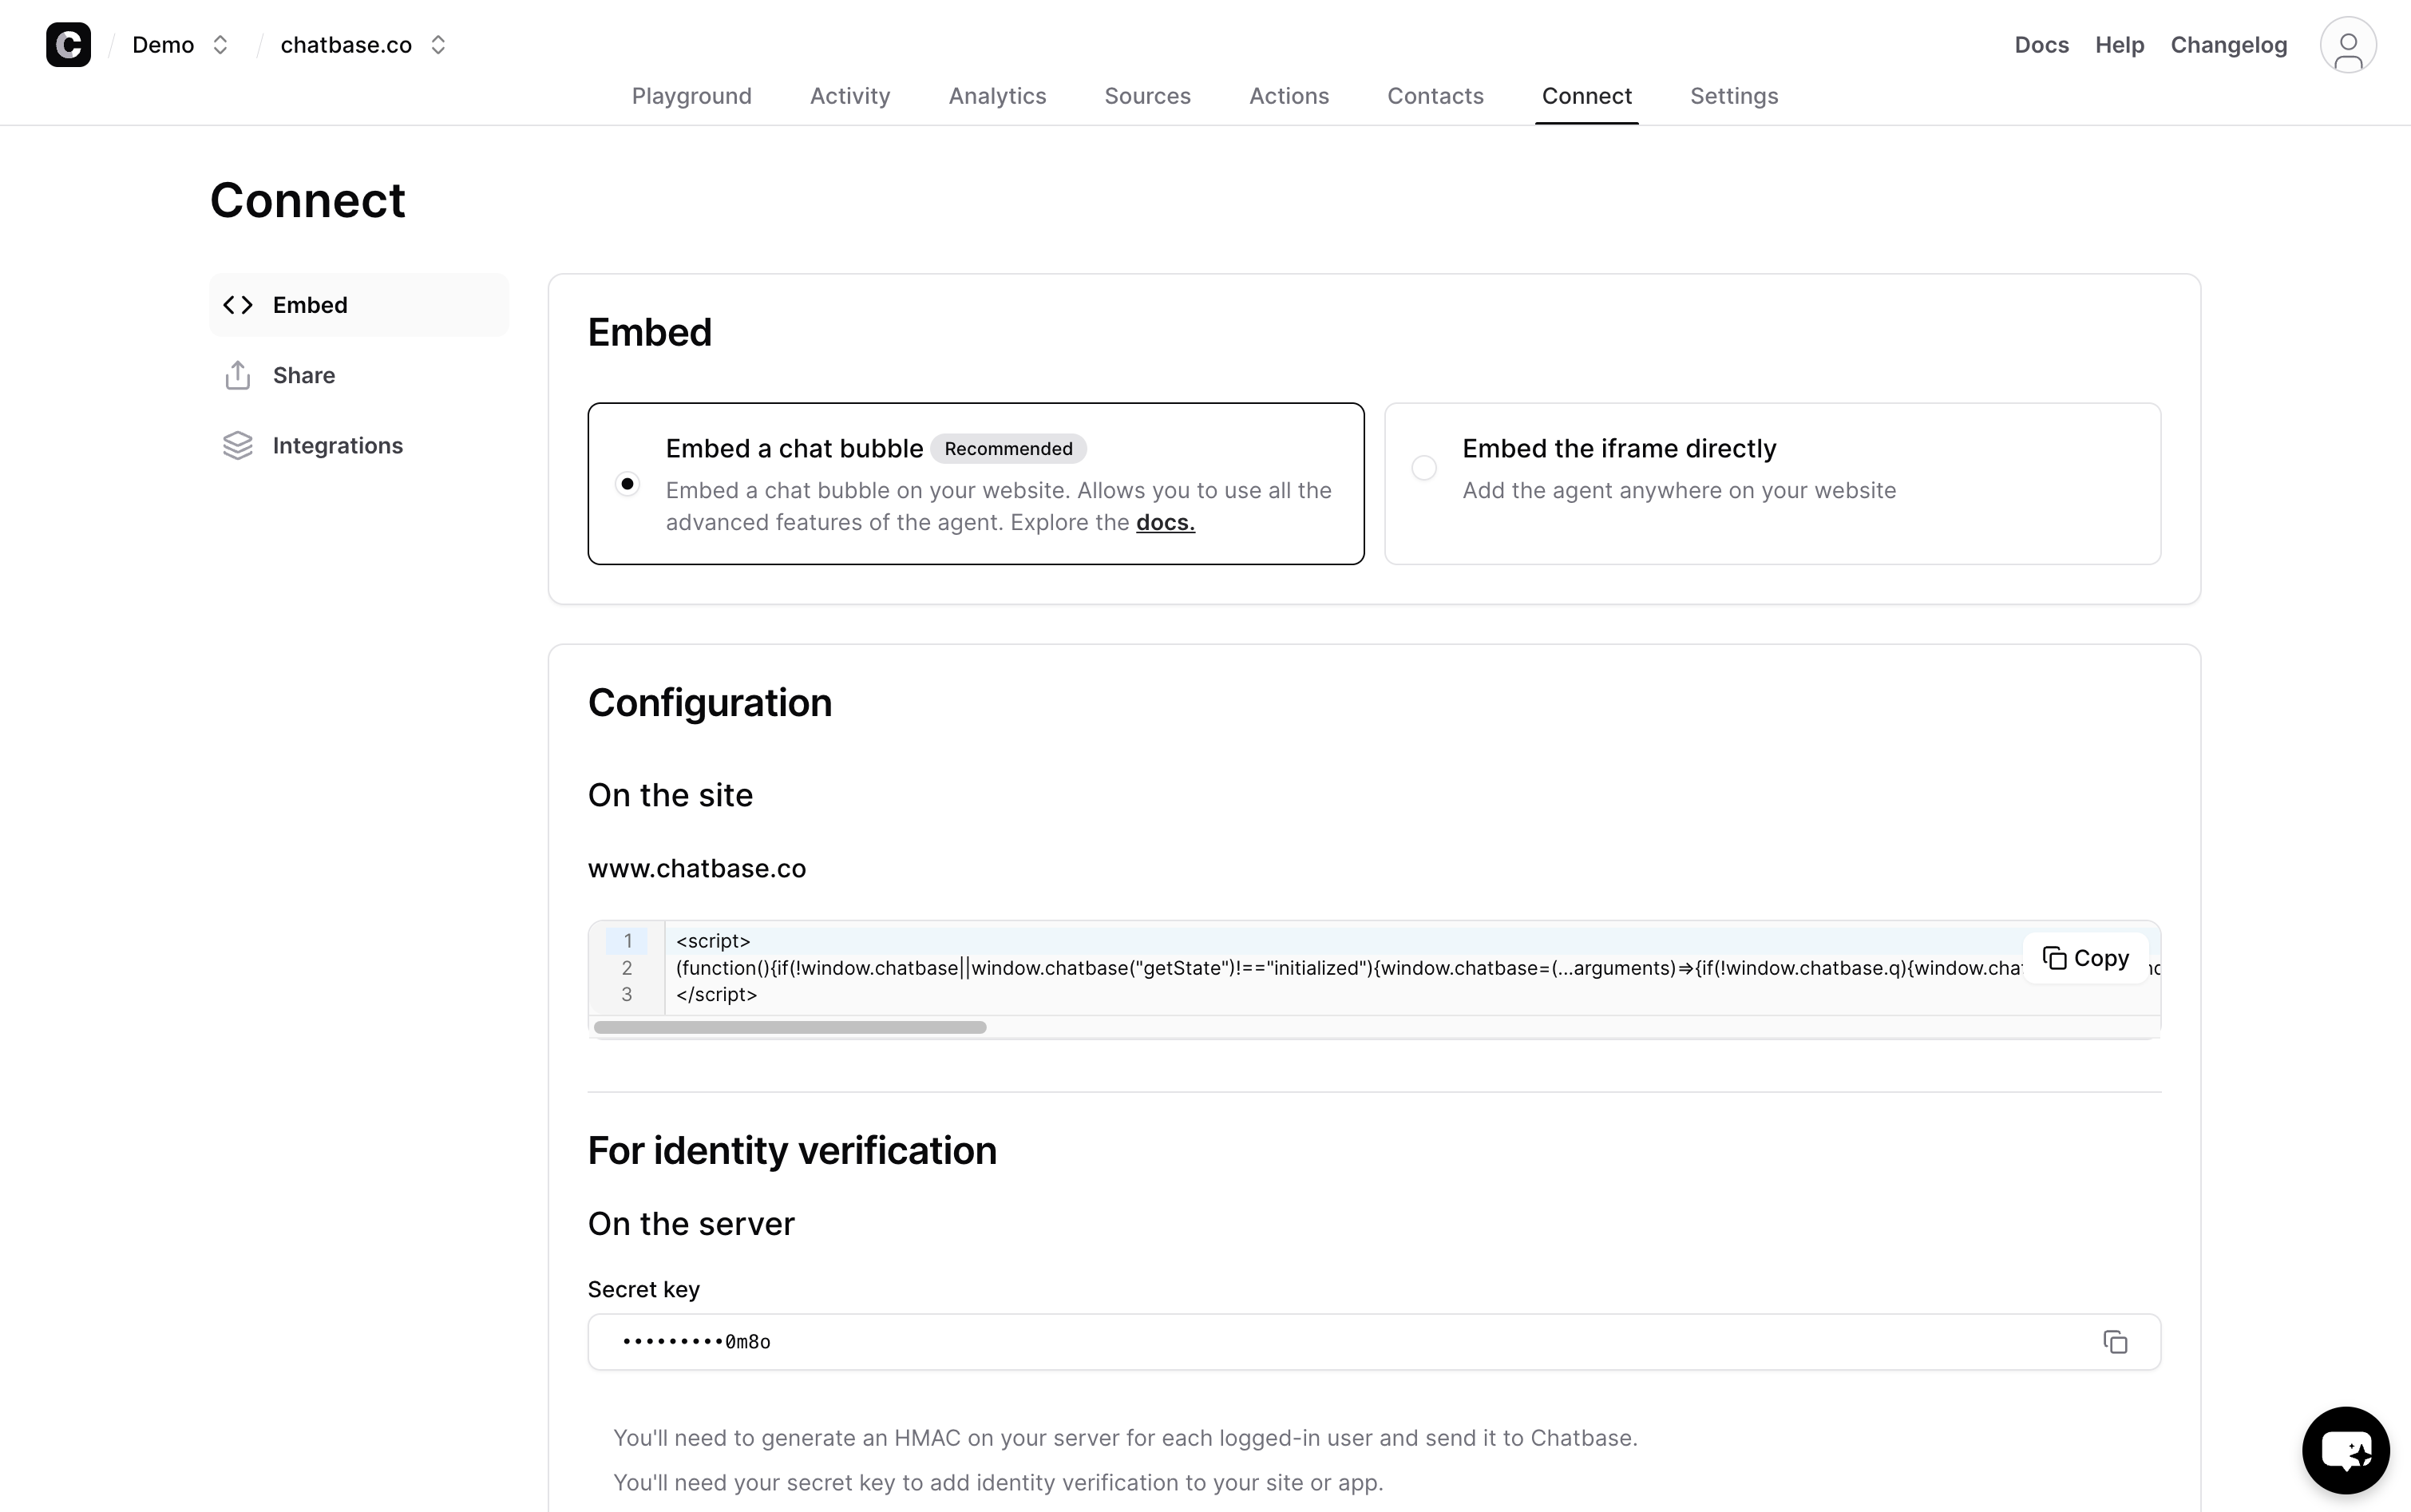
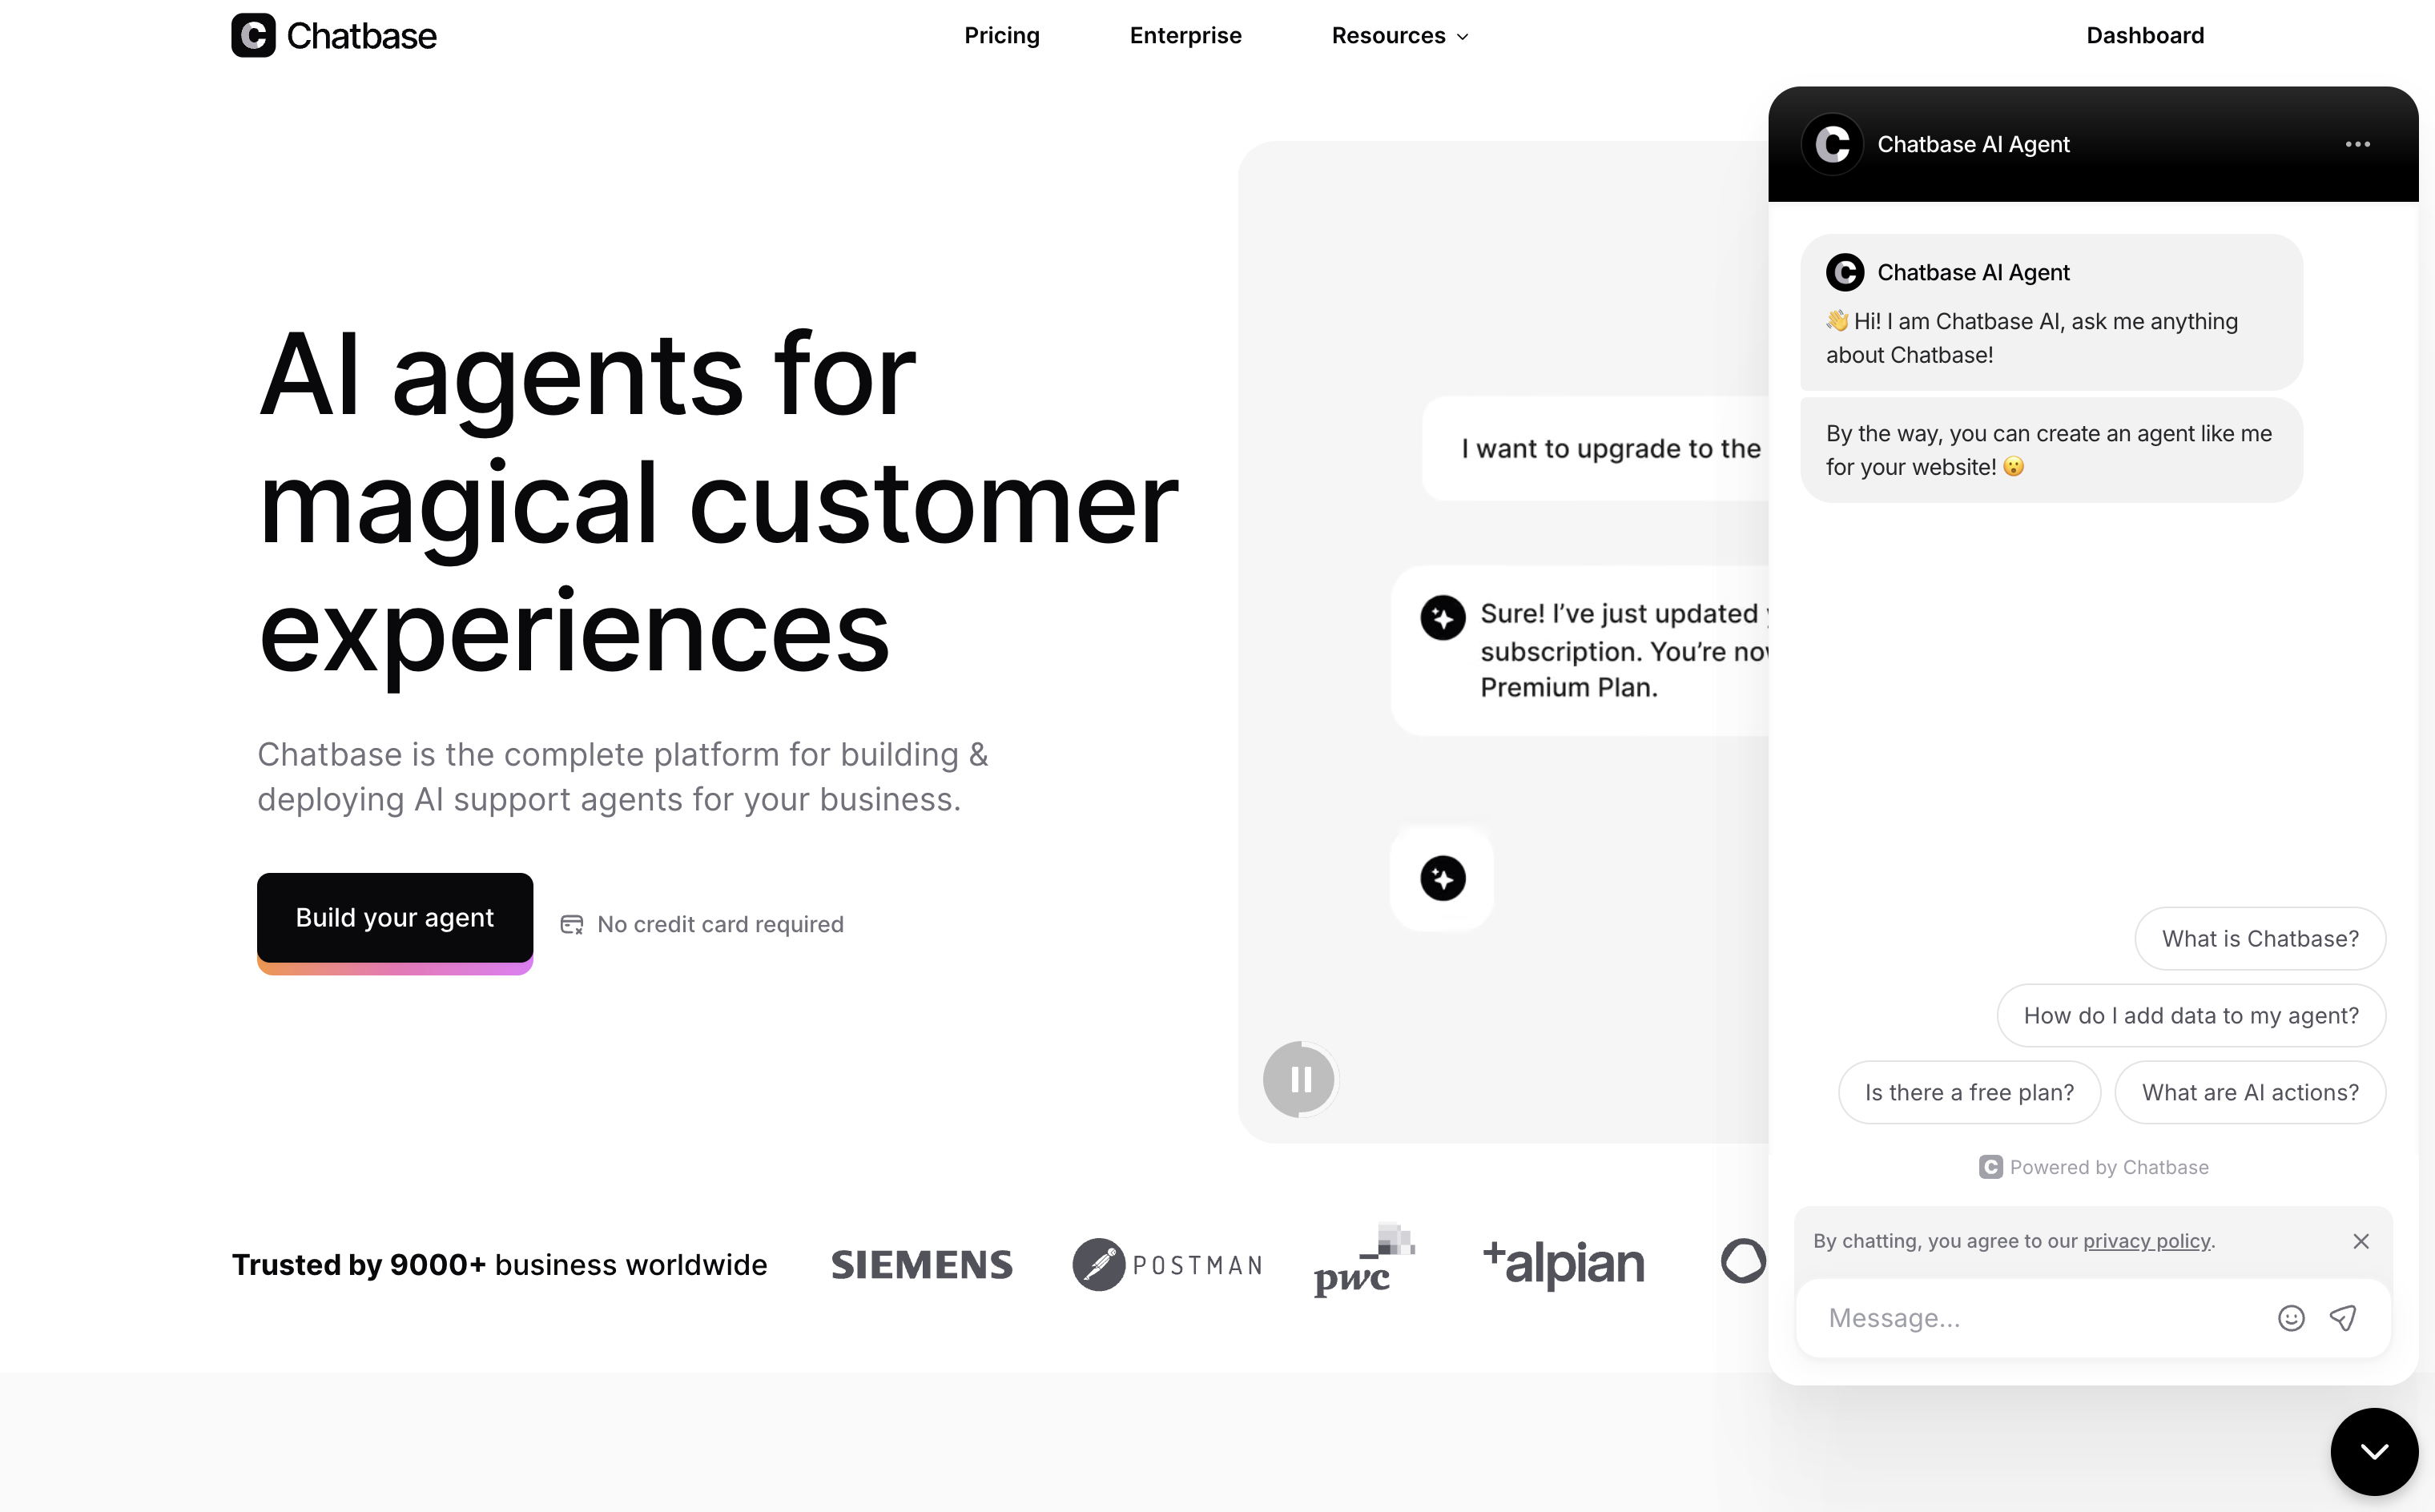
Embedding the Chat Bubble
Copy the provided script tag and add it to your website. Place it just before the closing </body> tag for best results:
<script
  src="https://chatsby.co/widget.js"
  data-bot-id="YOUR_BOT_ID"
  defer
></script>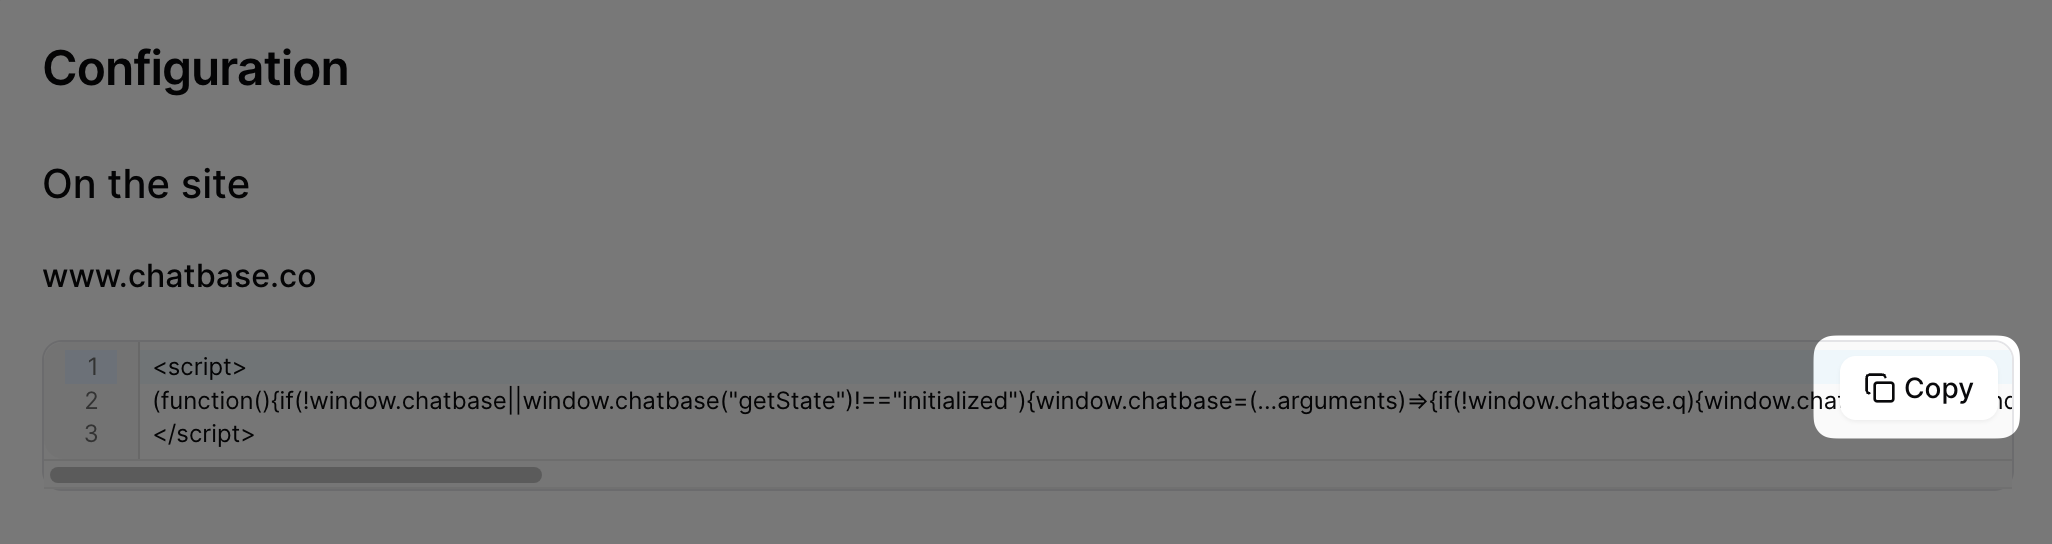
If you use a website builder, see our platform-specific guides for WordPress, Shopify, Webflow, Wix, or Framer.
Verify the Deployment
After adding the script to your site:
- Open your website in a new browser tab (or incognito window to avoid caching).
- You should see the chat bubble in the bottom-right (or bottom-left, depending on your settings) corner.
- Click it, type a question, and confirm the agent responds correctly.
- Check the Analytics tab in your Chatsby dashboard — you should see the conversation appear within a few seconds.
Troubleshooting Common Issues
The widget does not appear on my website
- Check the script placement. It should be before the closing
</body>tag, not inside<head>. - Verify the bot ID. Ensure the
data-bot-idattribute matches the ID shown on your Connect page. - Confirm the agent is set to Public. Private agents will not render the widget.
- Check for script blockers. Browser extensions like ad blockers or privacy tools may prevent the widget script from loading. Test in an incognito window with extensions disabled.
- Clear your cache. If you recently added the script, your browser may be serving a cached version of the page without it.
The agent gives incorrect or irrelevant answers
- Check your training data. The most common cause is that the answer simply is not in the training sources. Add the missing content and retrain.
- Review the system prompt. Vague instructions lead to vague responses. Be specific about what the agent should and should not do.
- Lower the temperature. A temperature above 0.7 can cause the agent to generate creative but inaccurate responses. Try 0.2-0.4 for factual support use cases.
- Add Q&A pairs. For critical questions where accuracy is essential, define exact Q&A pairs. These take priority over general training data during retrieval.
The agent says it does not know something that is in the training data
- Check that training completed. Navigate to Sources and verify all sources show a "Trained" status.
- Rephrase the question. Semantic search is not keyword matching. Try asking the question differently to see if the retrieval system finds the content.
- Break up large documents. If a single PDF contains hundreds of pages, the chunking process may not create optimal segments. Consider splitting large documents into smaller, topic-focused files.
Responses are slow
- Check your model selection. Larger, more capable models take longer to generate responses. If speed is critical, switch to a lighter model.
- Reduce training data noise. If you have a very large dataset with lots of irrelevant content, the retrieval step takes longer. Remove unnecessary sources.
Next Steps
Your agent is live. Here is what to do next:
- Sources — Learn advanced training techniques, including how to structure data for optimal retrieval and when to retrain.
- Analytics — Monitor your agent's performance and identify improvement opportunities.
- Agent Settings — Full reference for all configuration options including lead capture, human escalation, and response behavior.
- Actions — Configure your agent to perform actions like looking up orders, checking account status, or triggering workflows.
- Connect — Advanced deployment options and multi-channel distribution.
- Integrations — Connect your agent to Slack, WhatsApp, Zapier, HubSpot, Zendesk, and more.
- API Reference — Build custom integrations with the Chatsby REST API.
On this page
- Prerequisites
- Step 1: Create a New Agent
- Adding Training Data
- Example: Training on a Website URL
- Step 2: Understanding the Training Process
- How Long Does Training Take?
- What Affects Response Quality?
- Step 3: Testing in the Playground
- How to Evaluate Your Agent
- Improving Responses
- Step 4: Customizing Your Agent
- Configuration Options
- Chat Interface Customization
- Step 5: Deploying Your Agent
- Make Your Agent Public
- Choose Your Deployment Method
- Embedding the Chat Bubble
- Verify the Deployment
- Troubleshooting Common Issues
- The widget does not appear on my website
- The agent gives incorrect or irrelevant answers
- The agent says it does not know something that is in the training data
- Responses are slow
- Next Steps